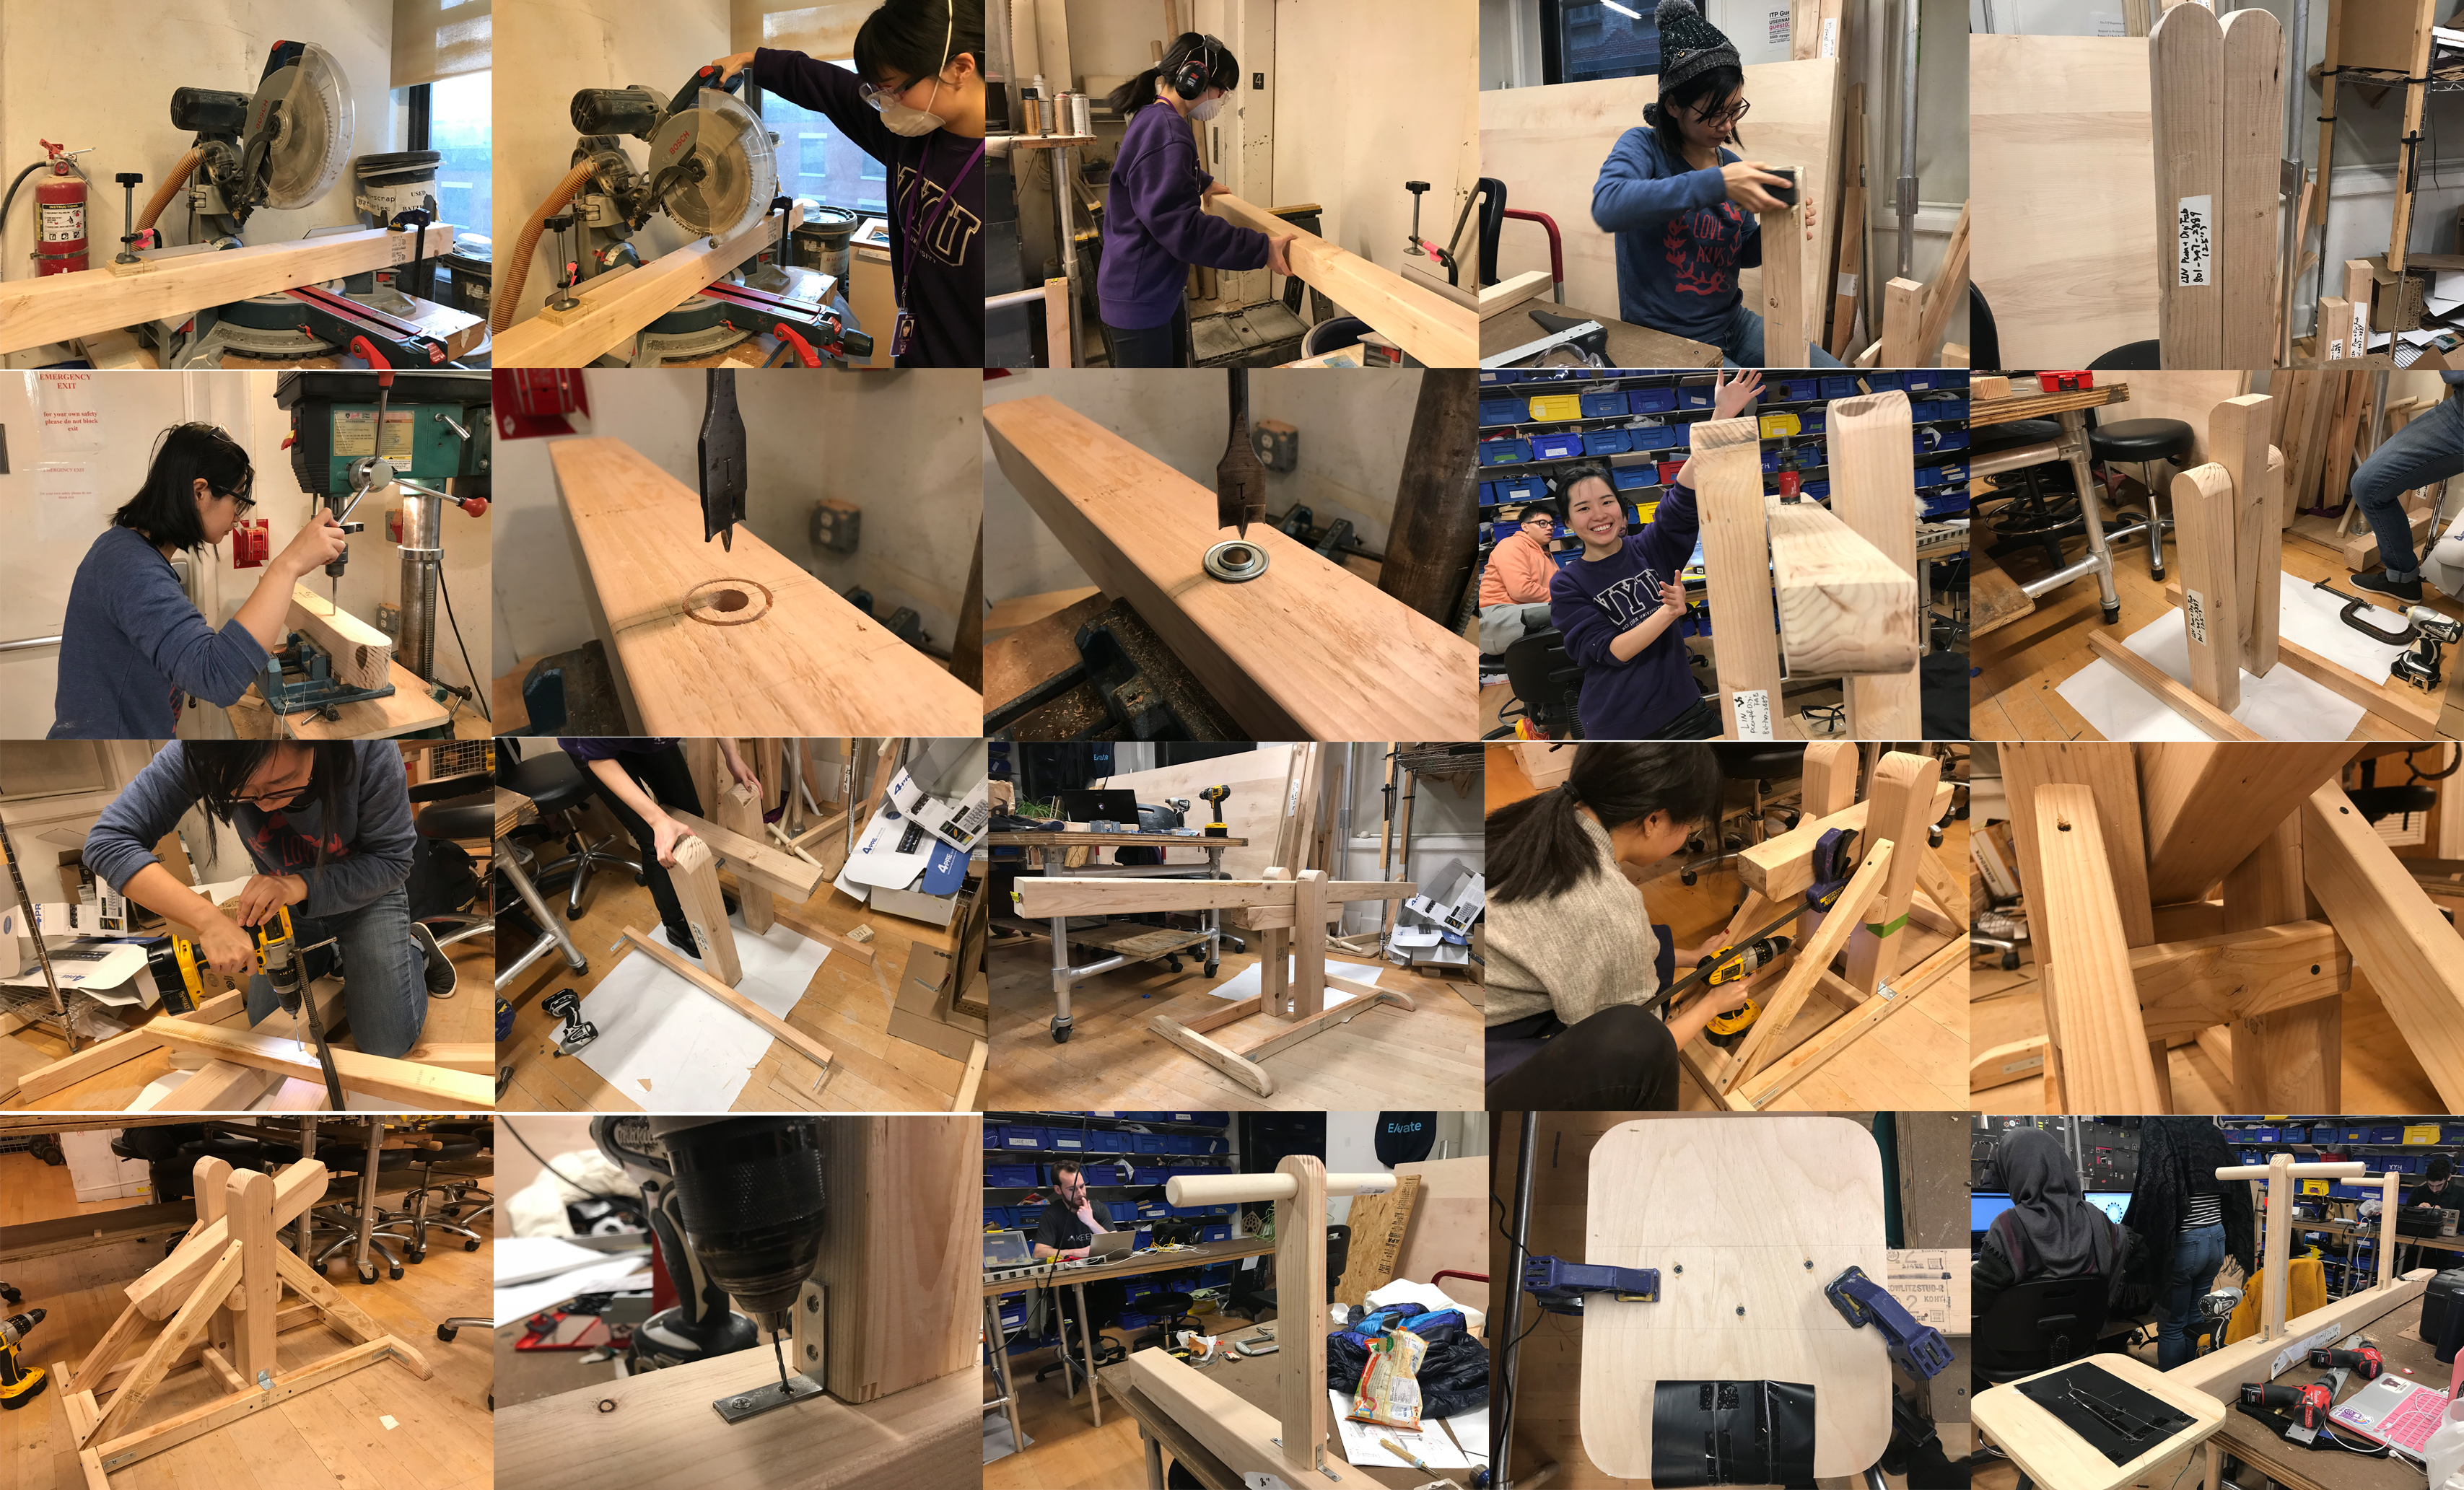
SeeSaw production
Seesaww Design Process
Scenario

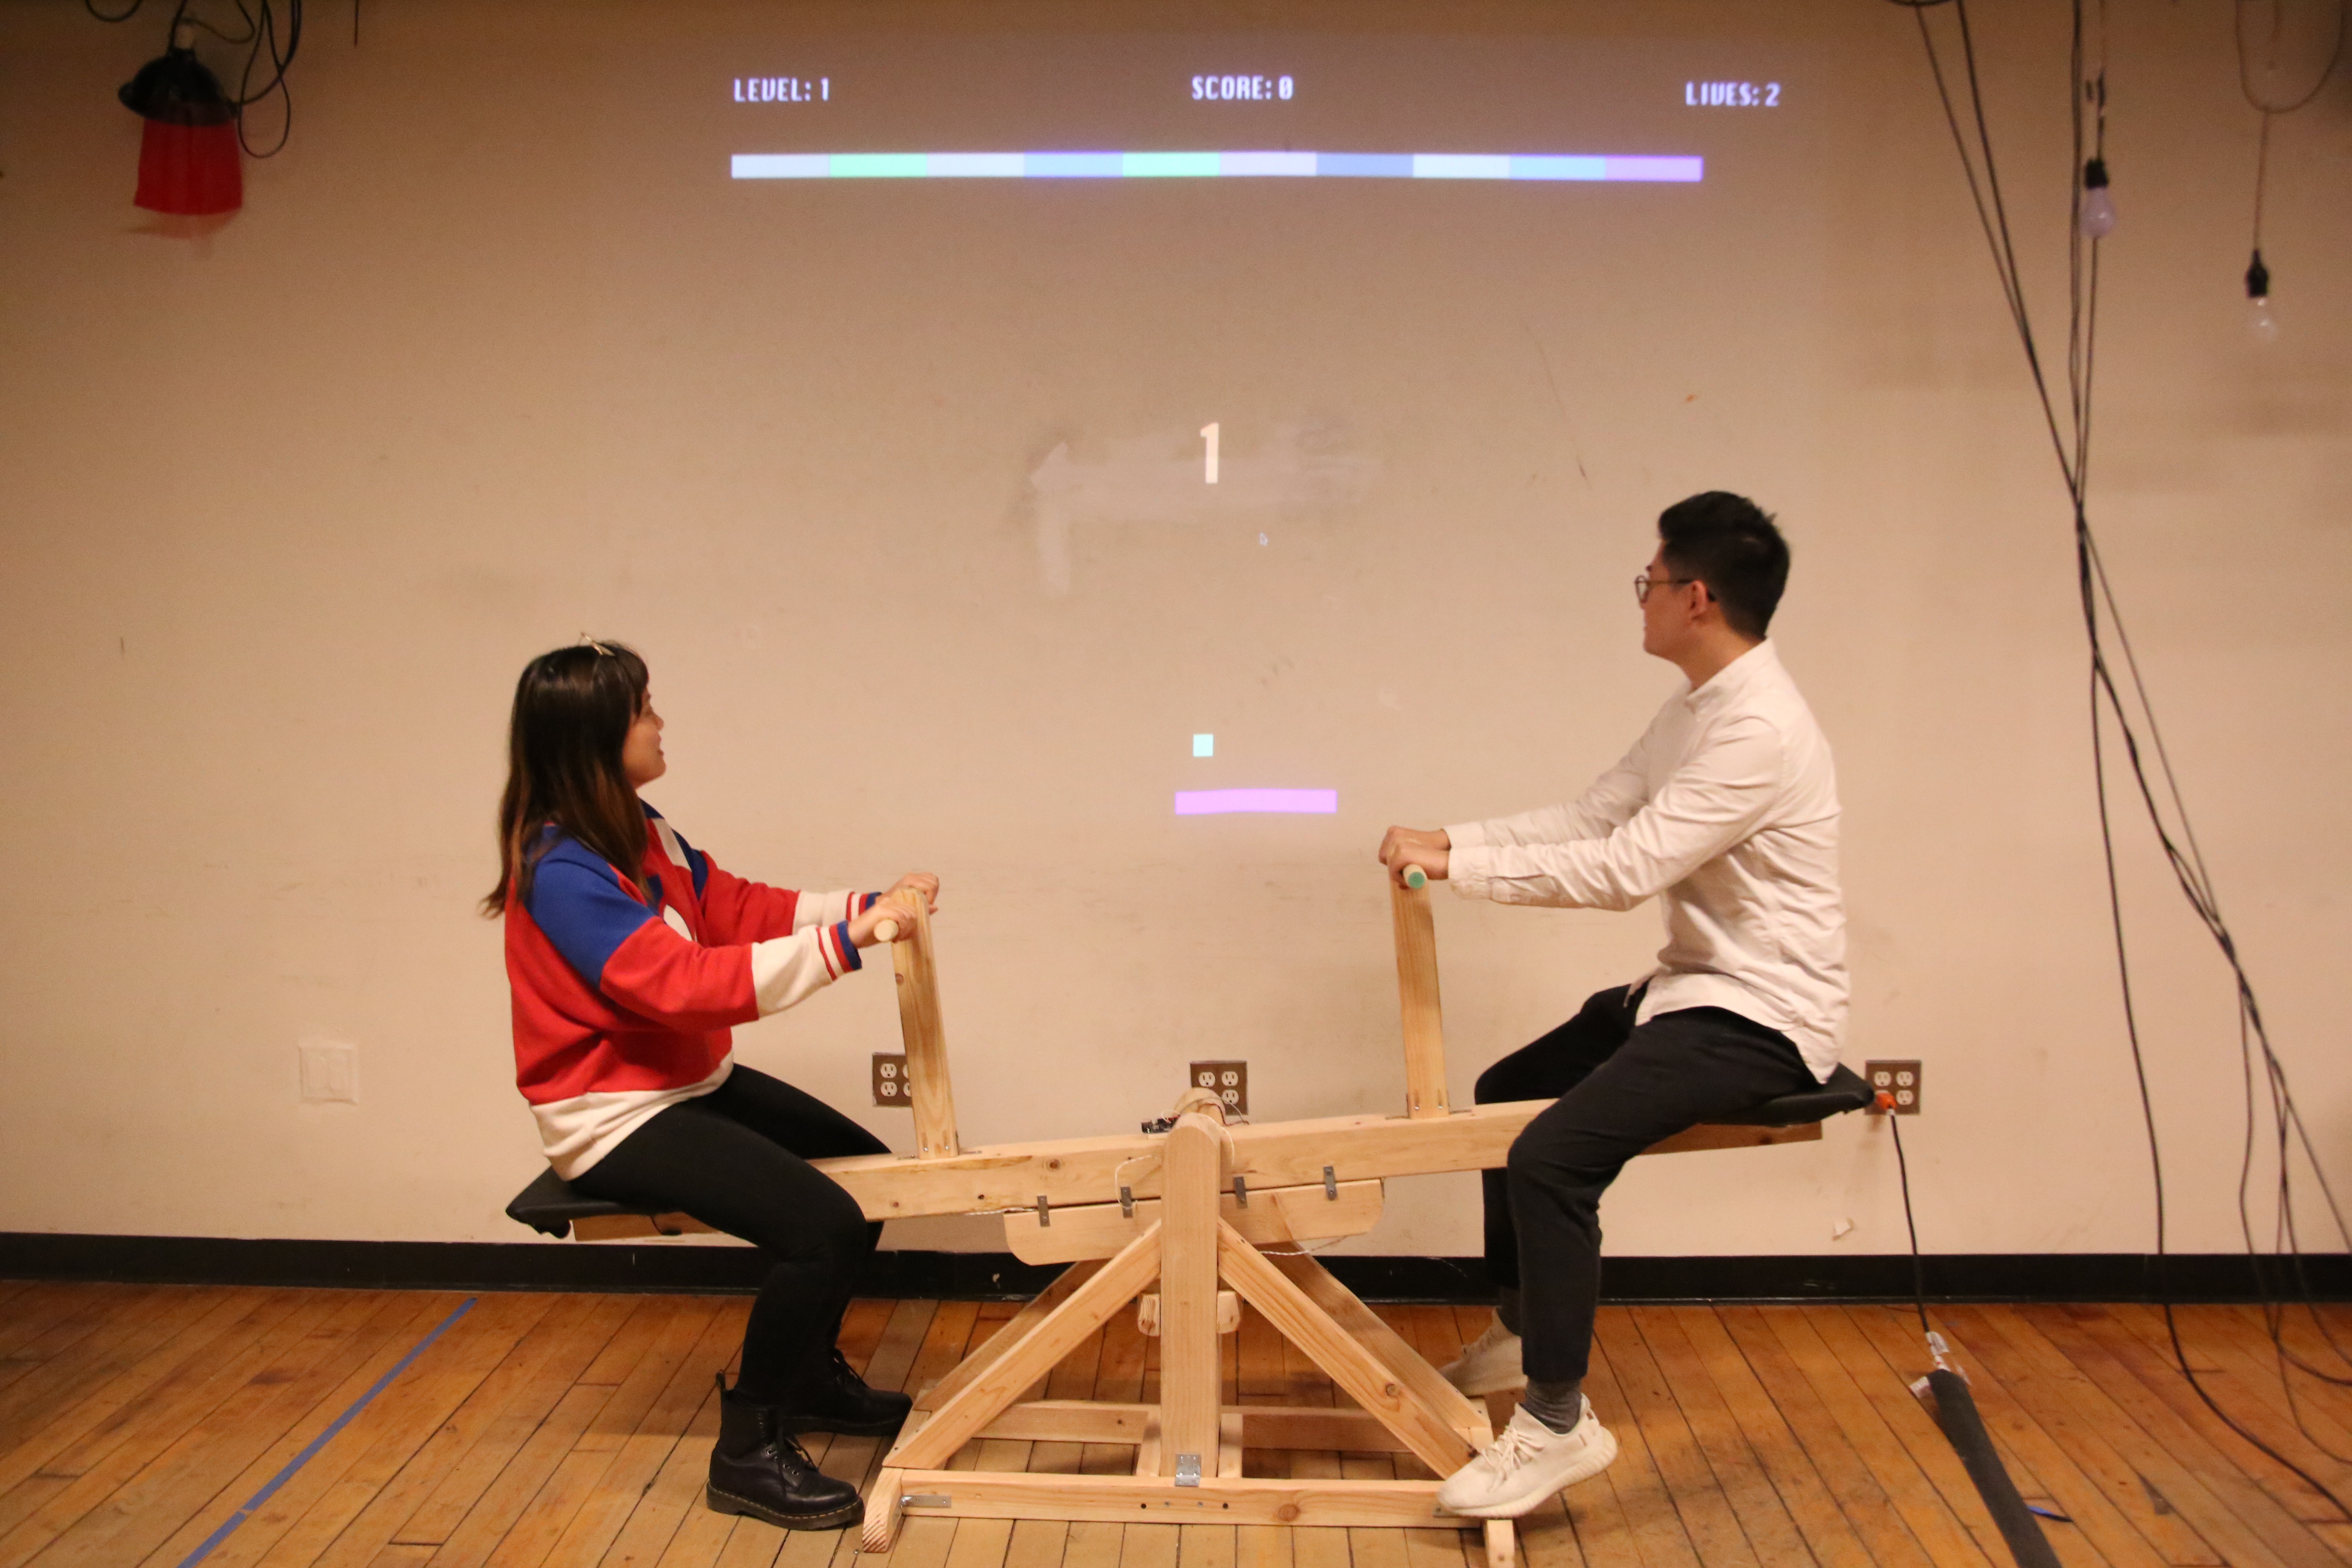
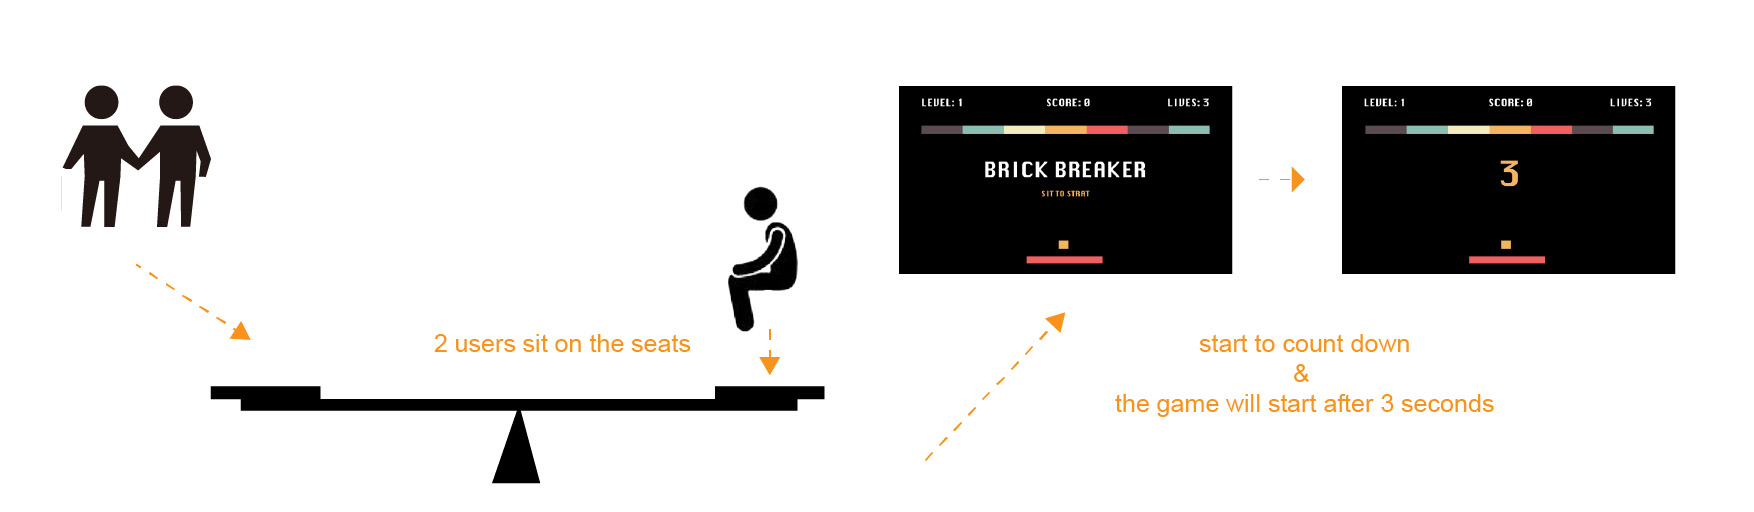
User Flow
Play Testing
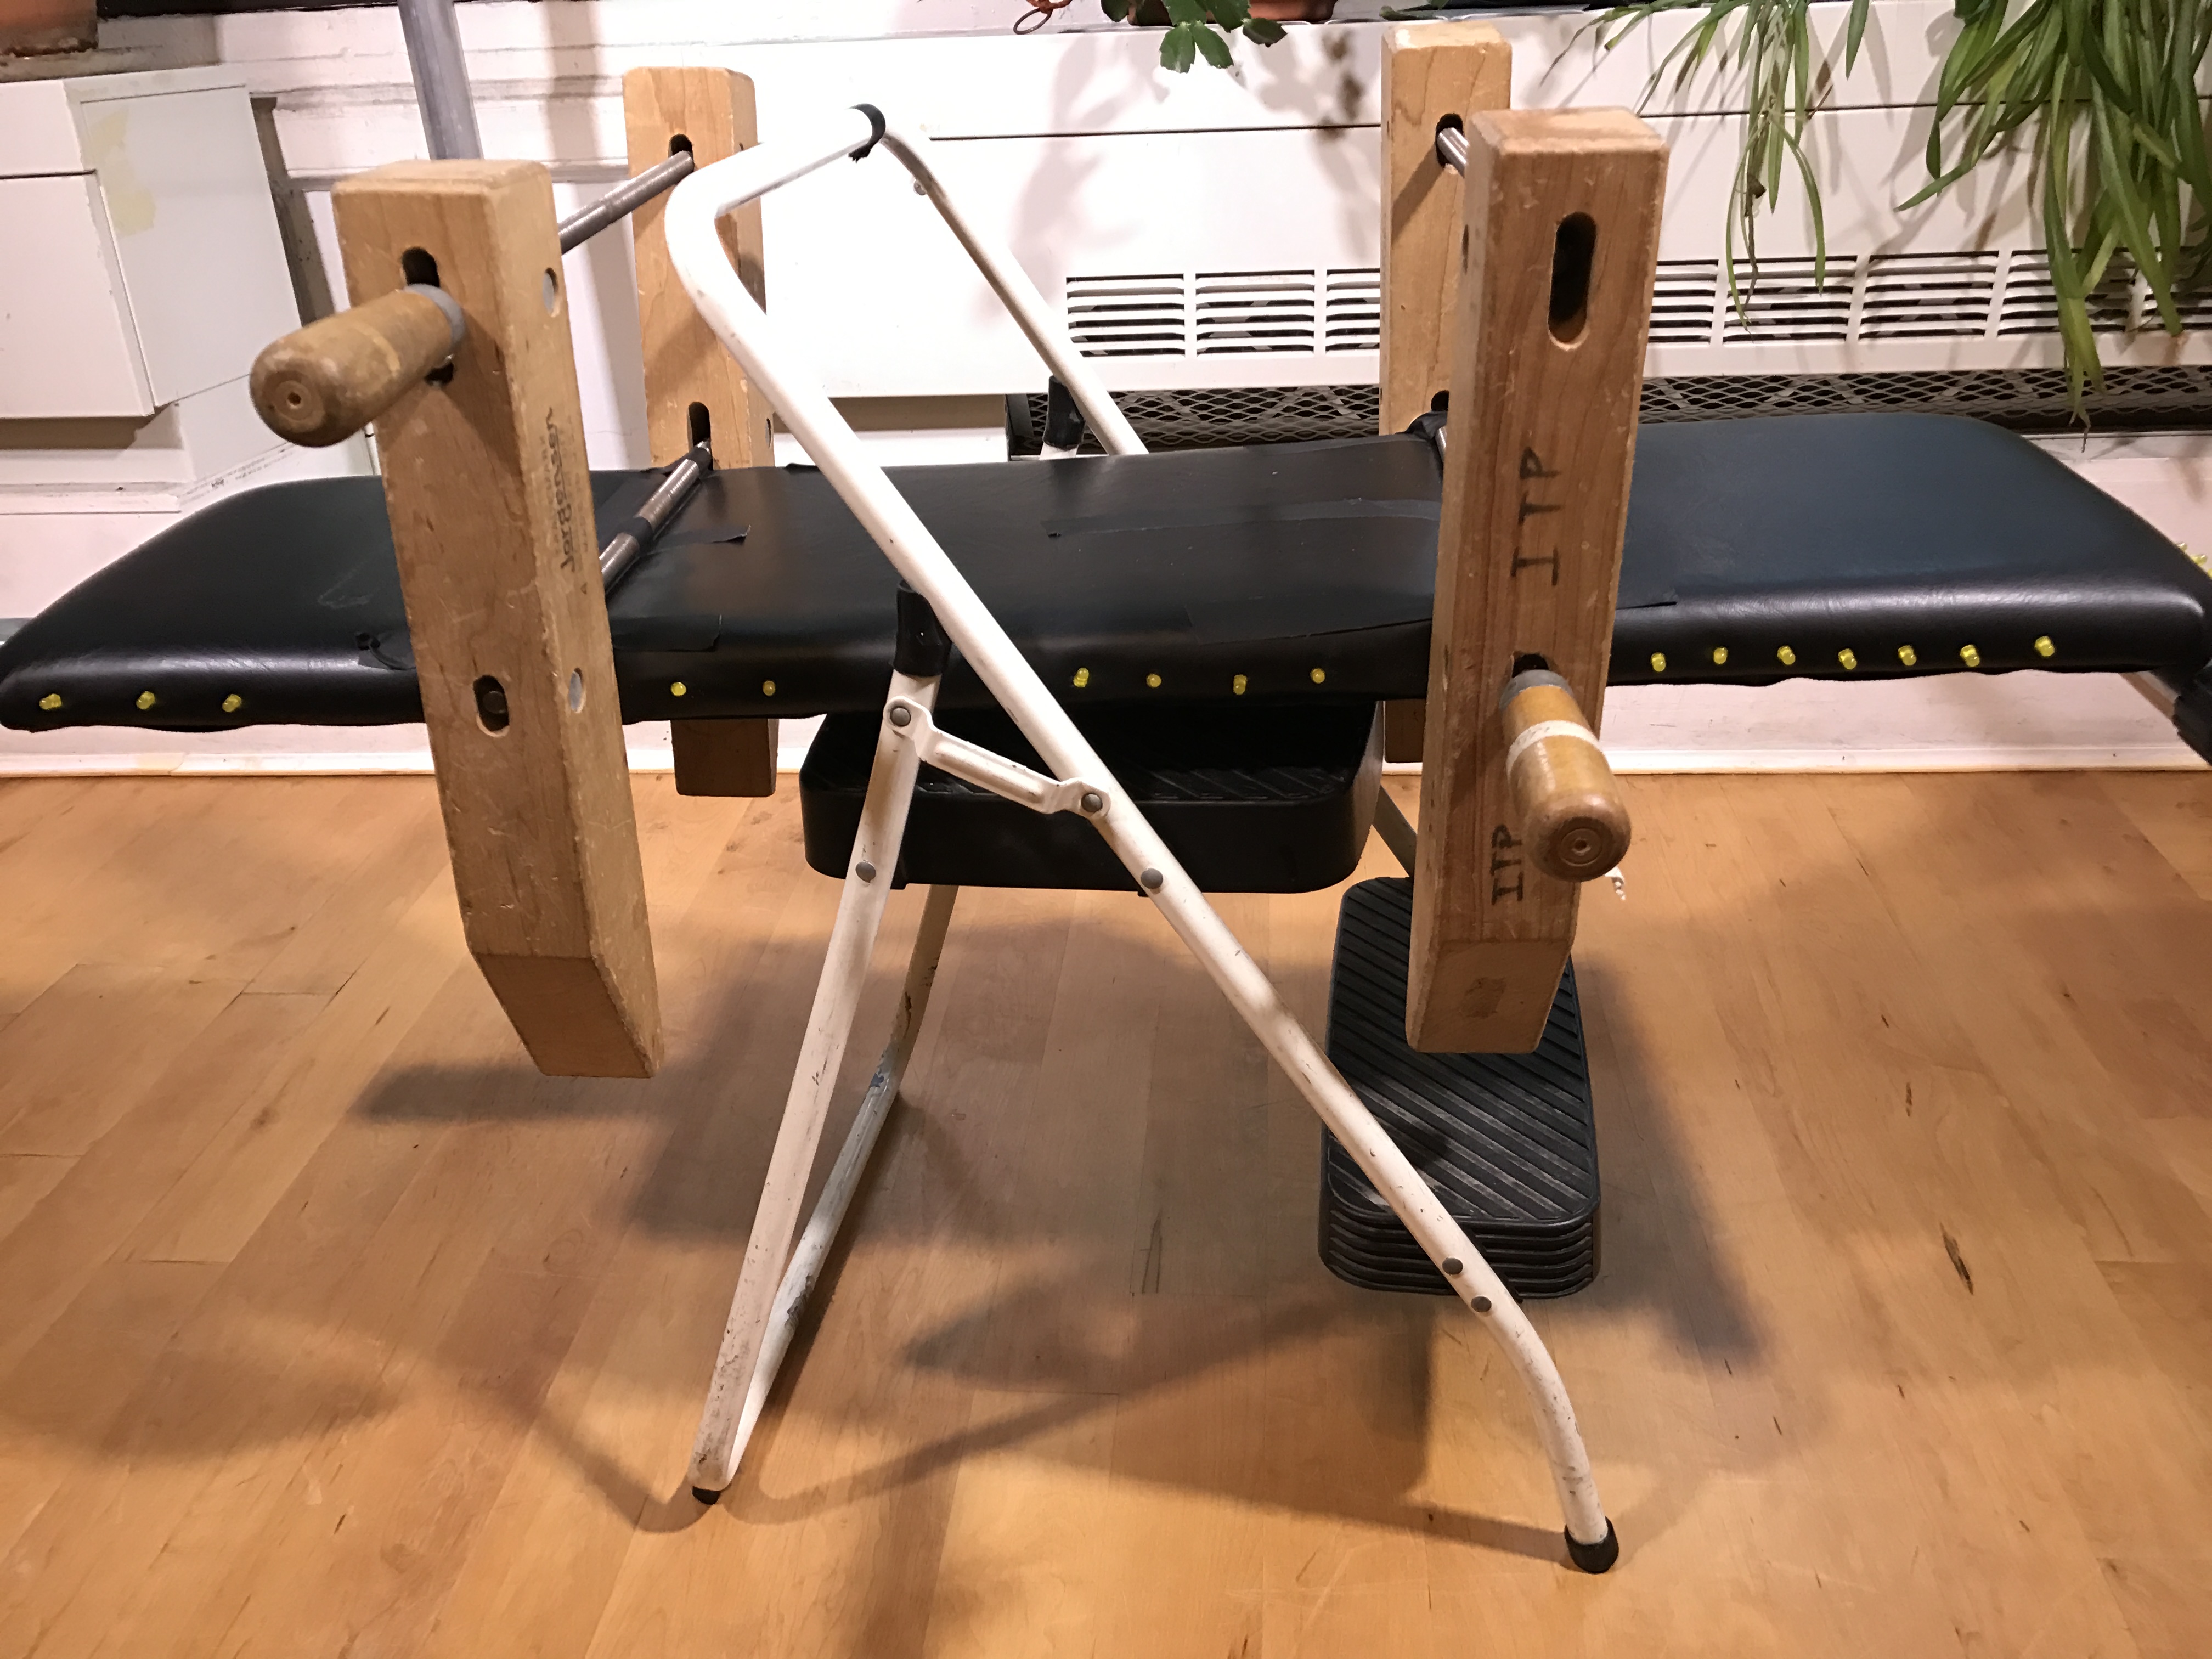
Before we build a full scale seesaw, we tested the project concept by conducting a play testing session of 30 users. My partner and I recorded and collected the user experience and feedback. The initial prototype utilizes items we had in the shop and used them as a representation of our project components and features. For example, the seesaw was represented by a broken workout bench and a small ladder. The LED lights on the sides of the bench are supposed to be LED strips.
Based on the feedback, we removed the lighting feature and came up with strategies to start the game.
Fabrication
Why build a seesaw? Can’t we buy one?
The intended audience is adults. We searched for seesaw for adults with no results on the major online retailers: Amazon, Aliexpress, and Google shopping. The ones we can find are designed for kids from age 4 to 8. To ensure a safe and fun experience, we built a seesaw that is measured and designed according to the body size of adults.
Bill of material
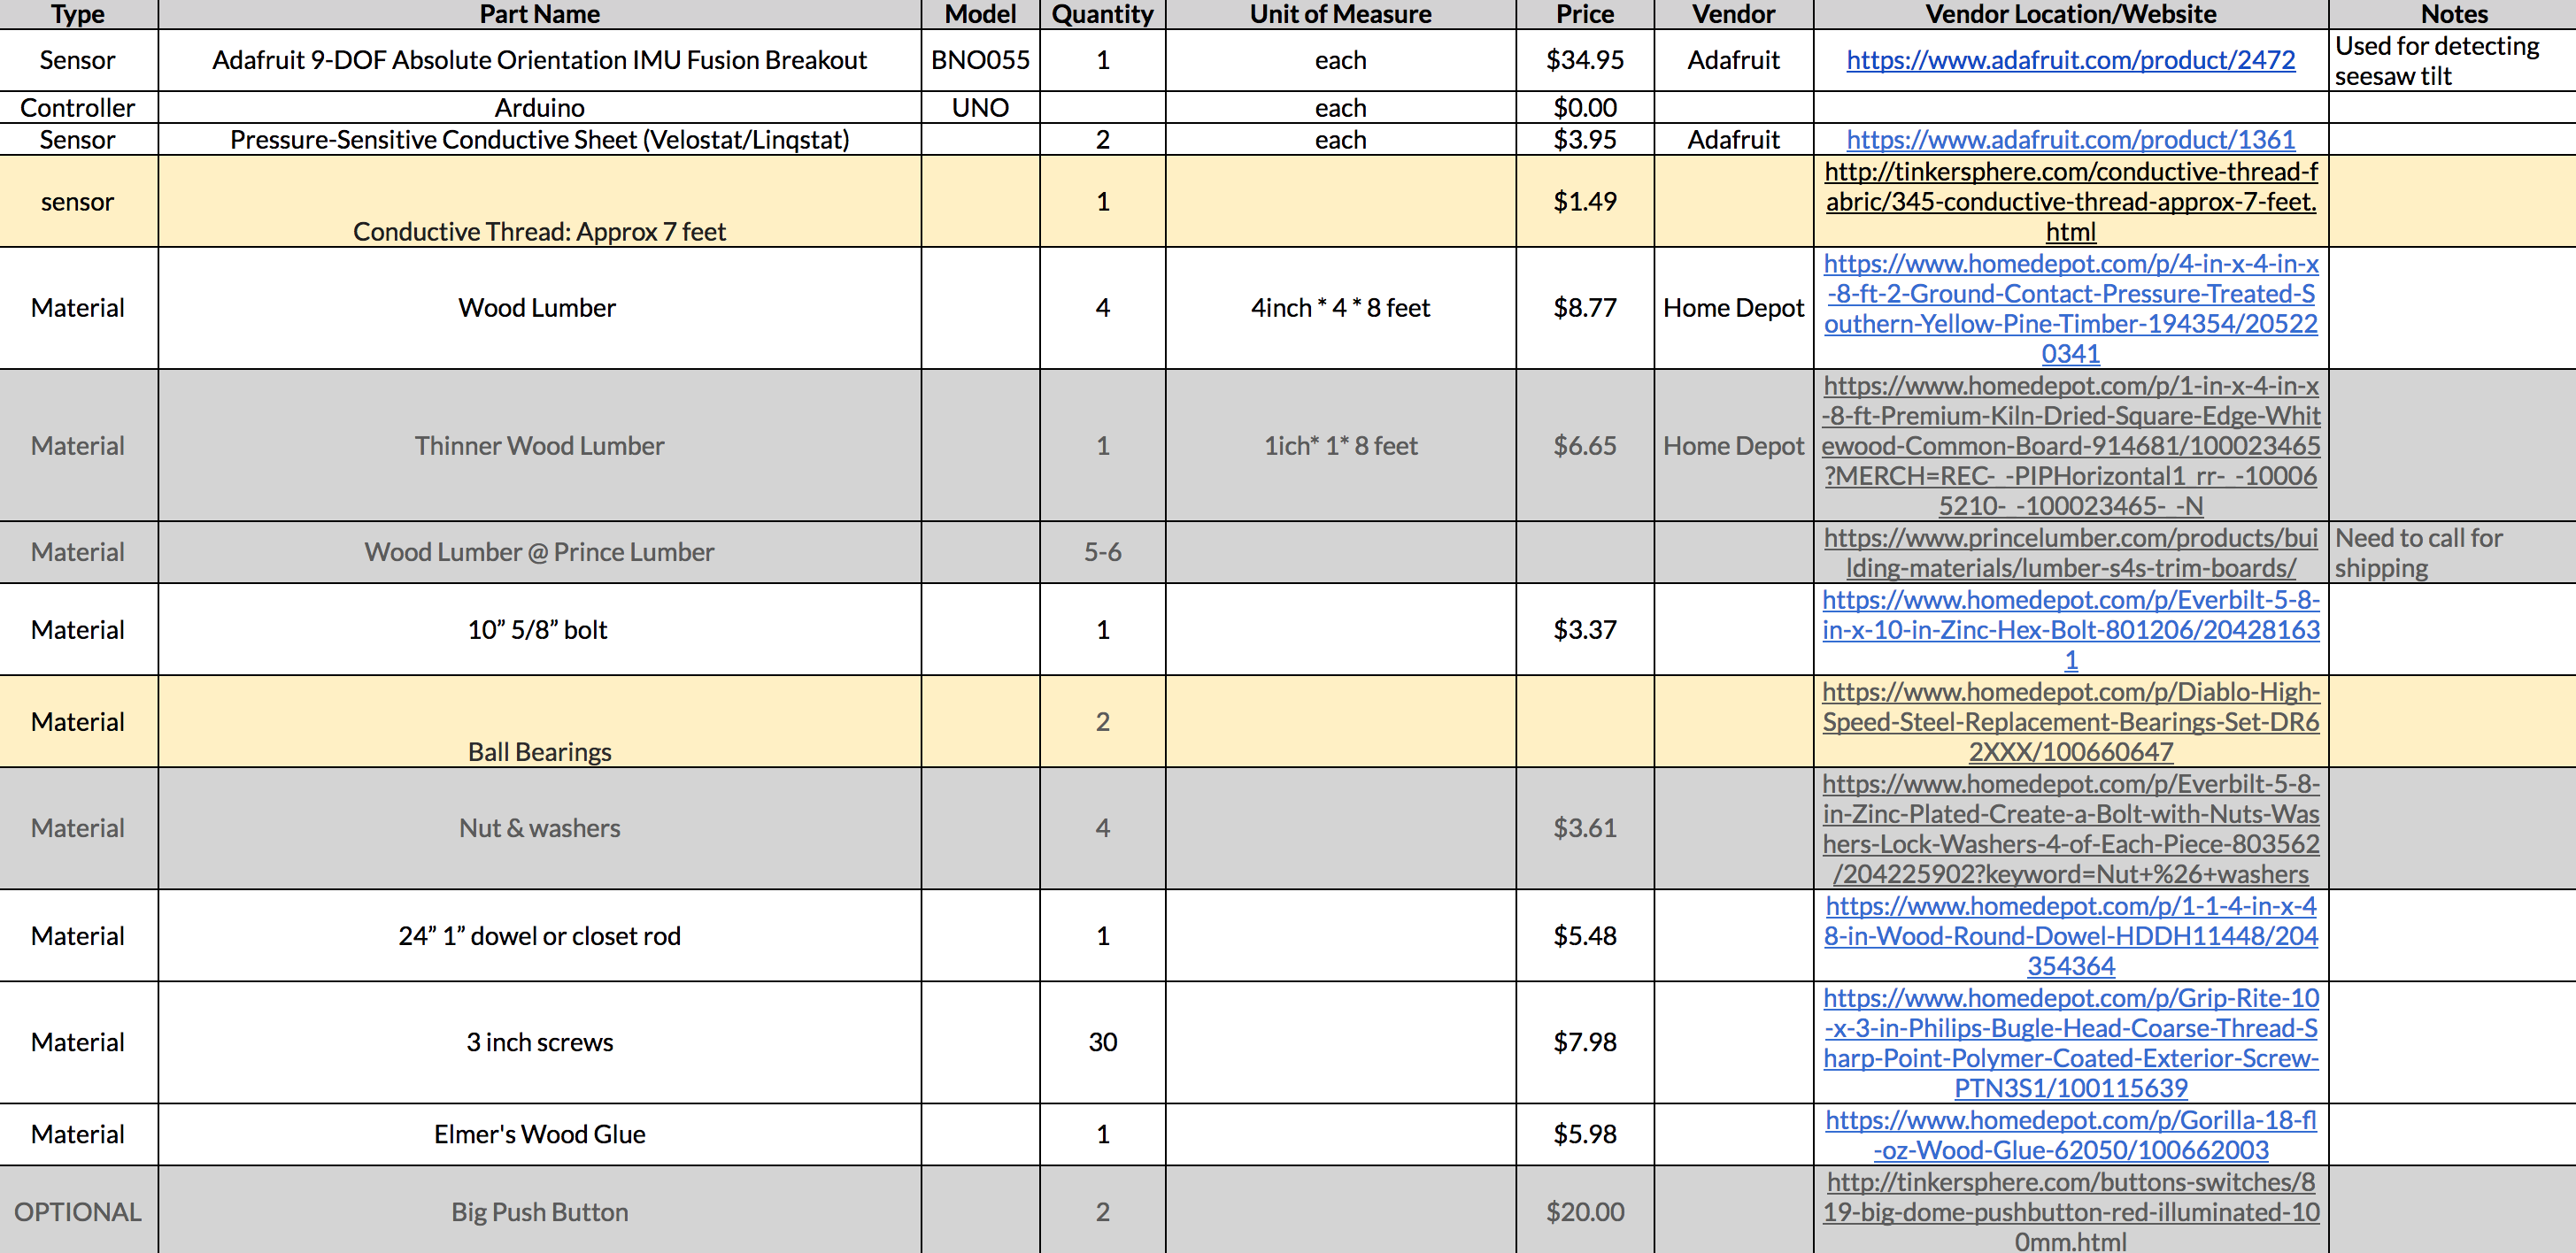
Items with grey background are materials we planned but did not use. The ones with yellow background are those we did not plan but used in our project.
Seesaw Design
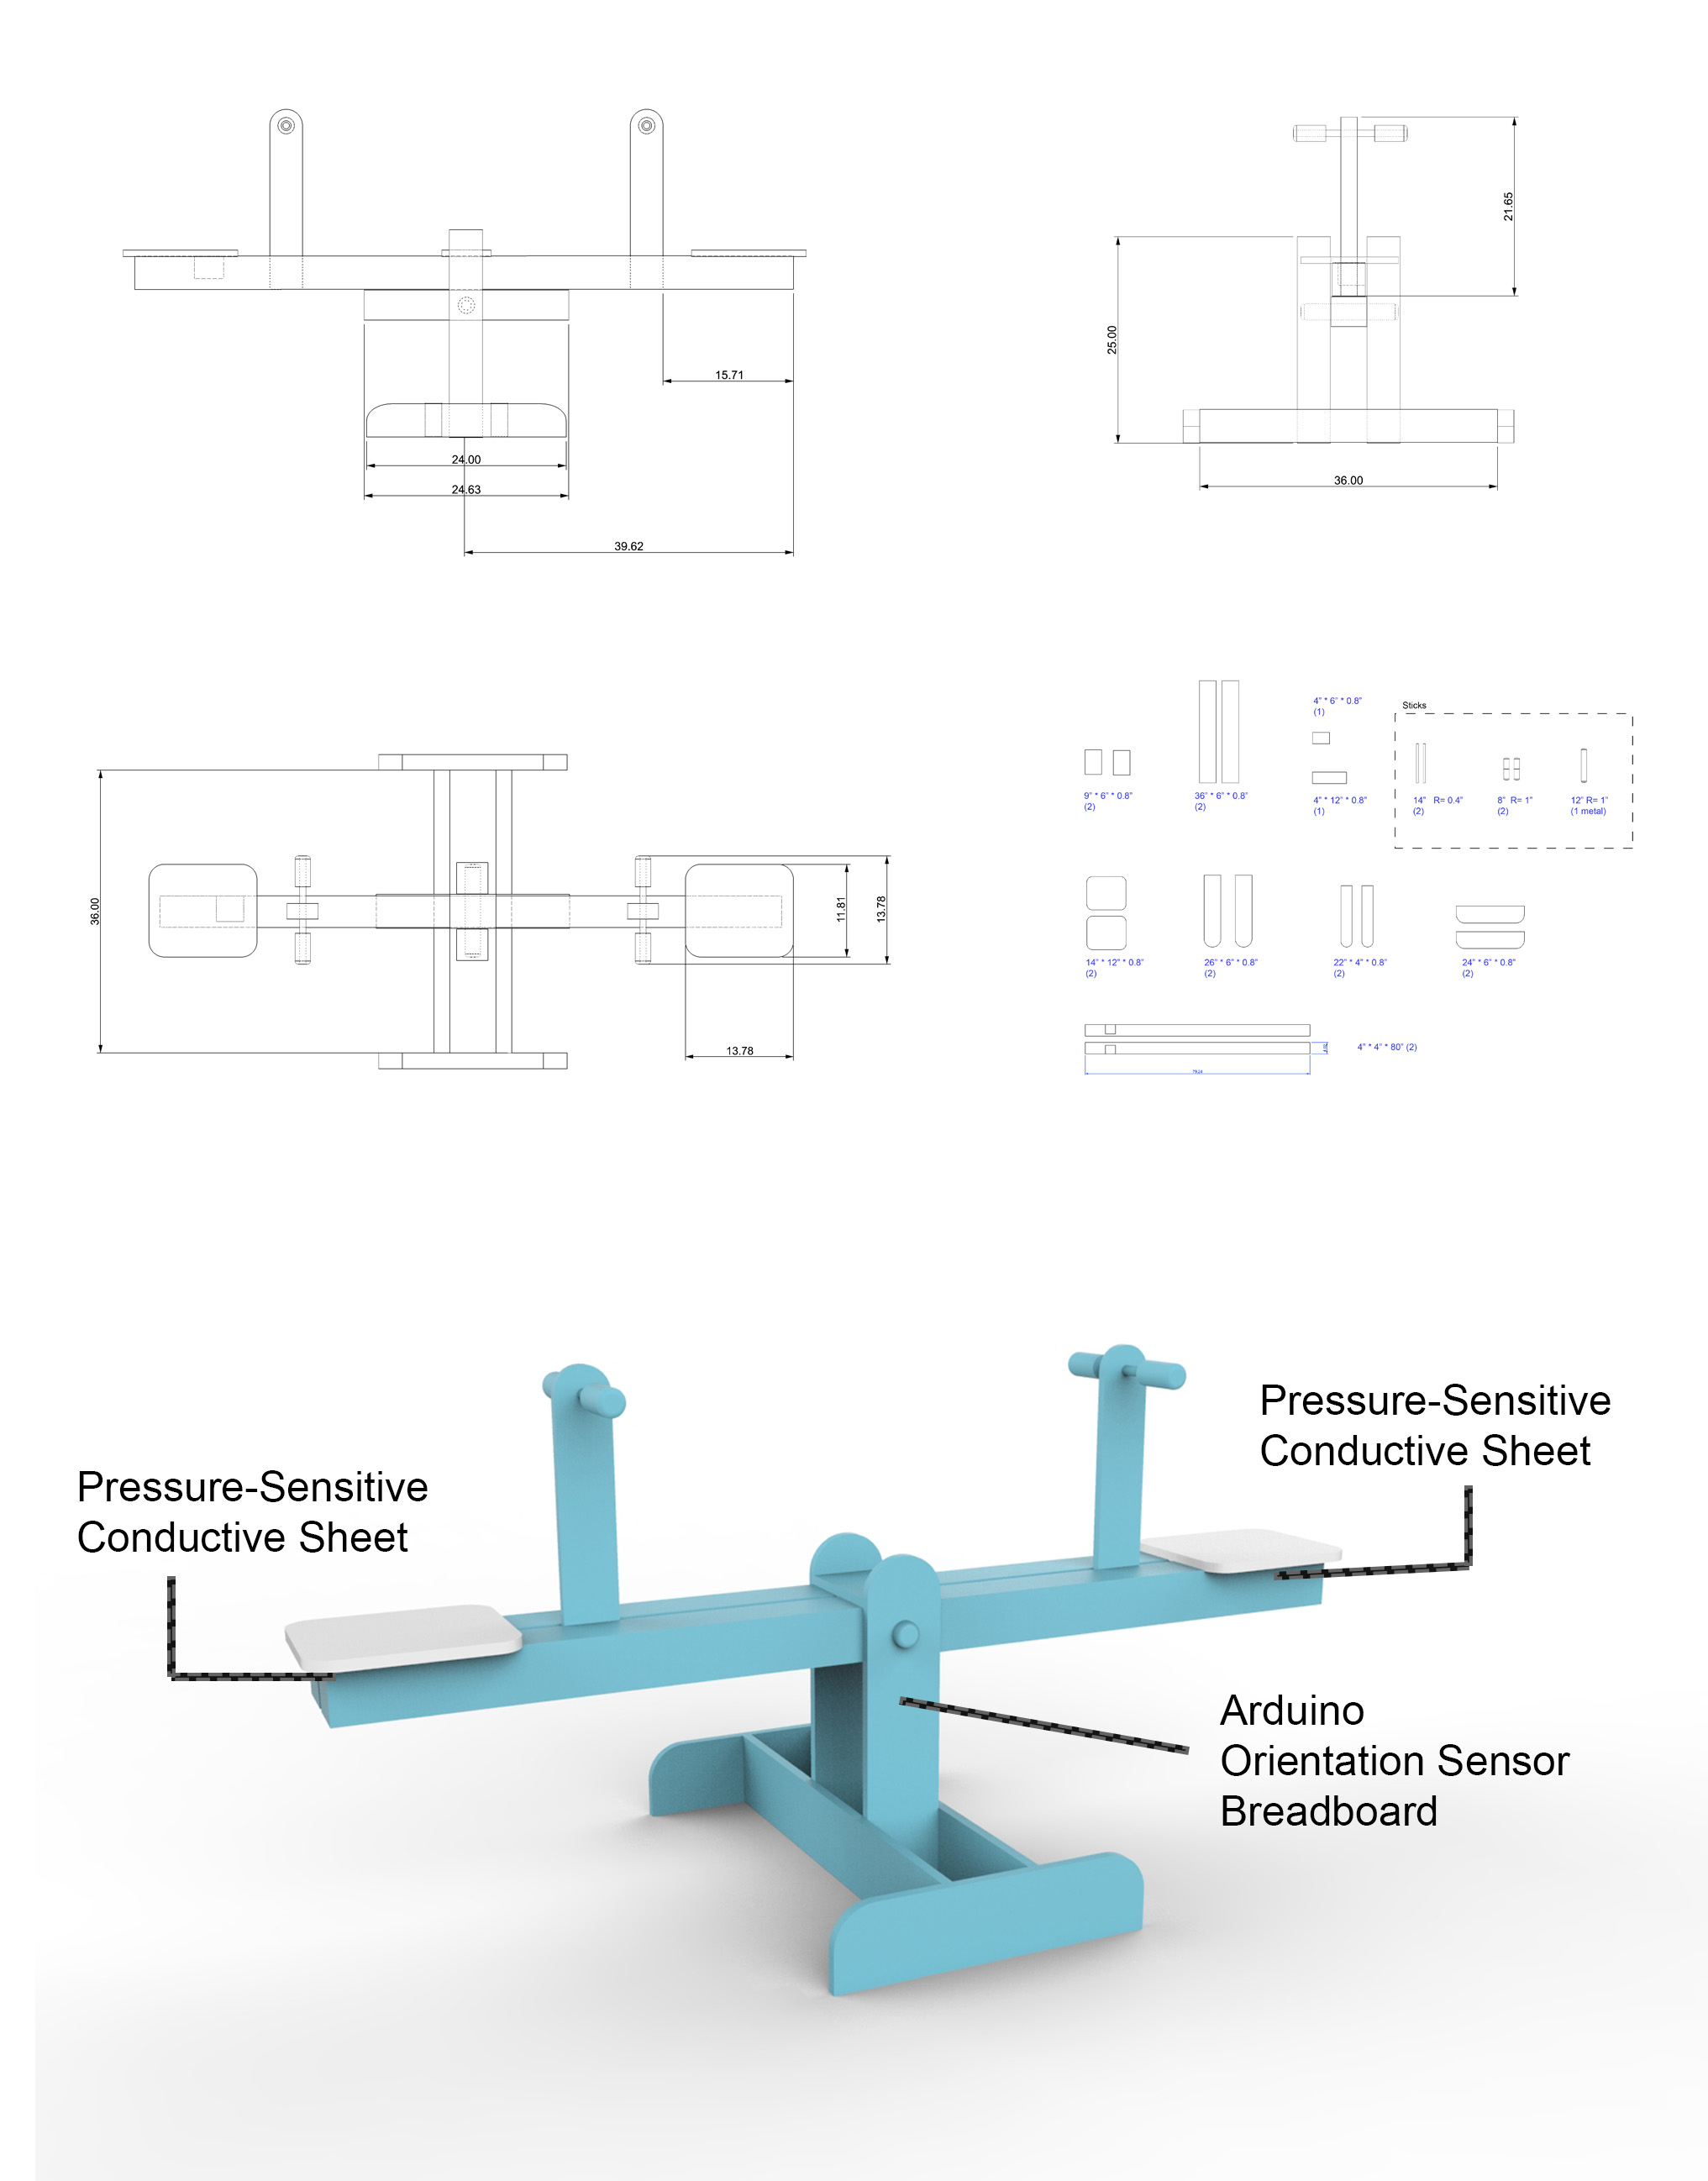
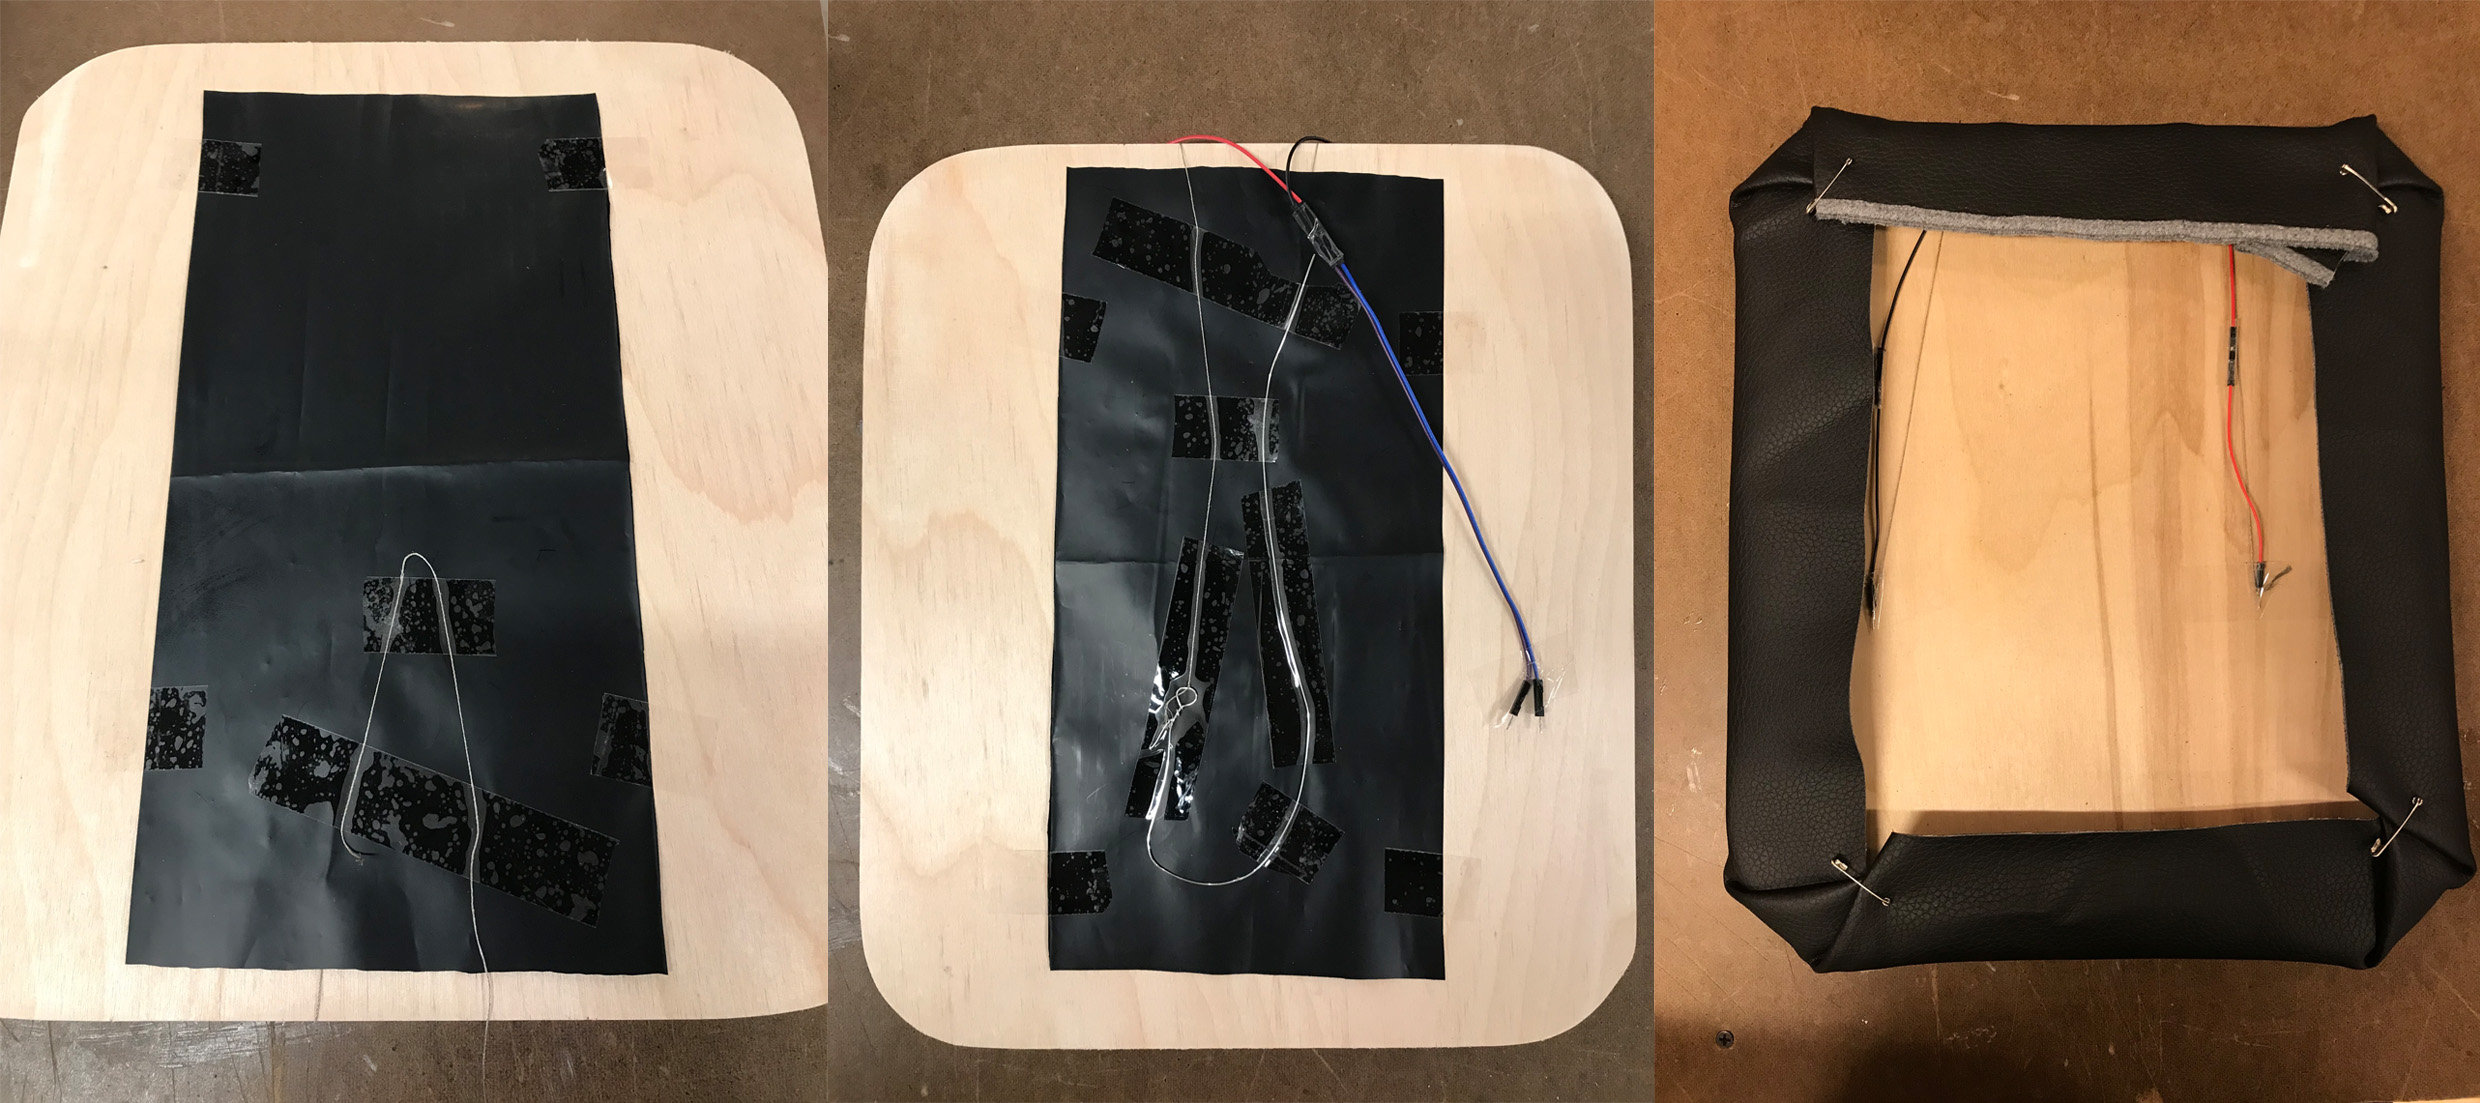
Fabrication Process

Physical Computing
Circuit Diagram
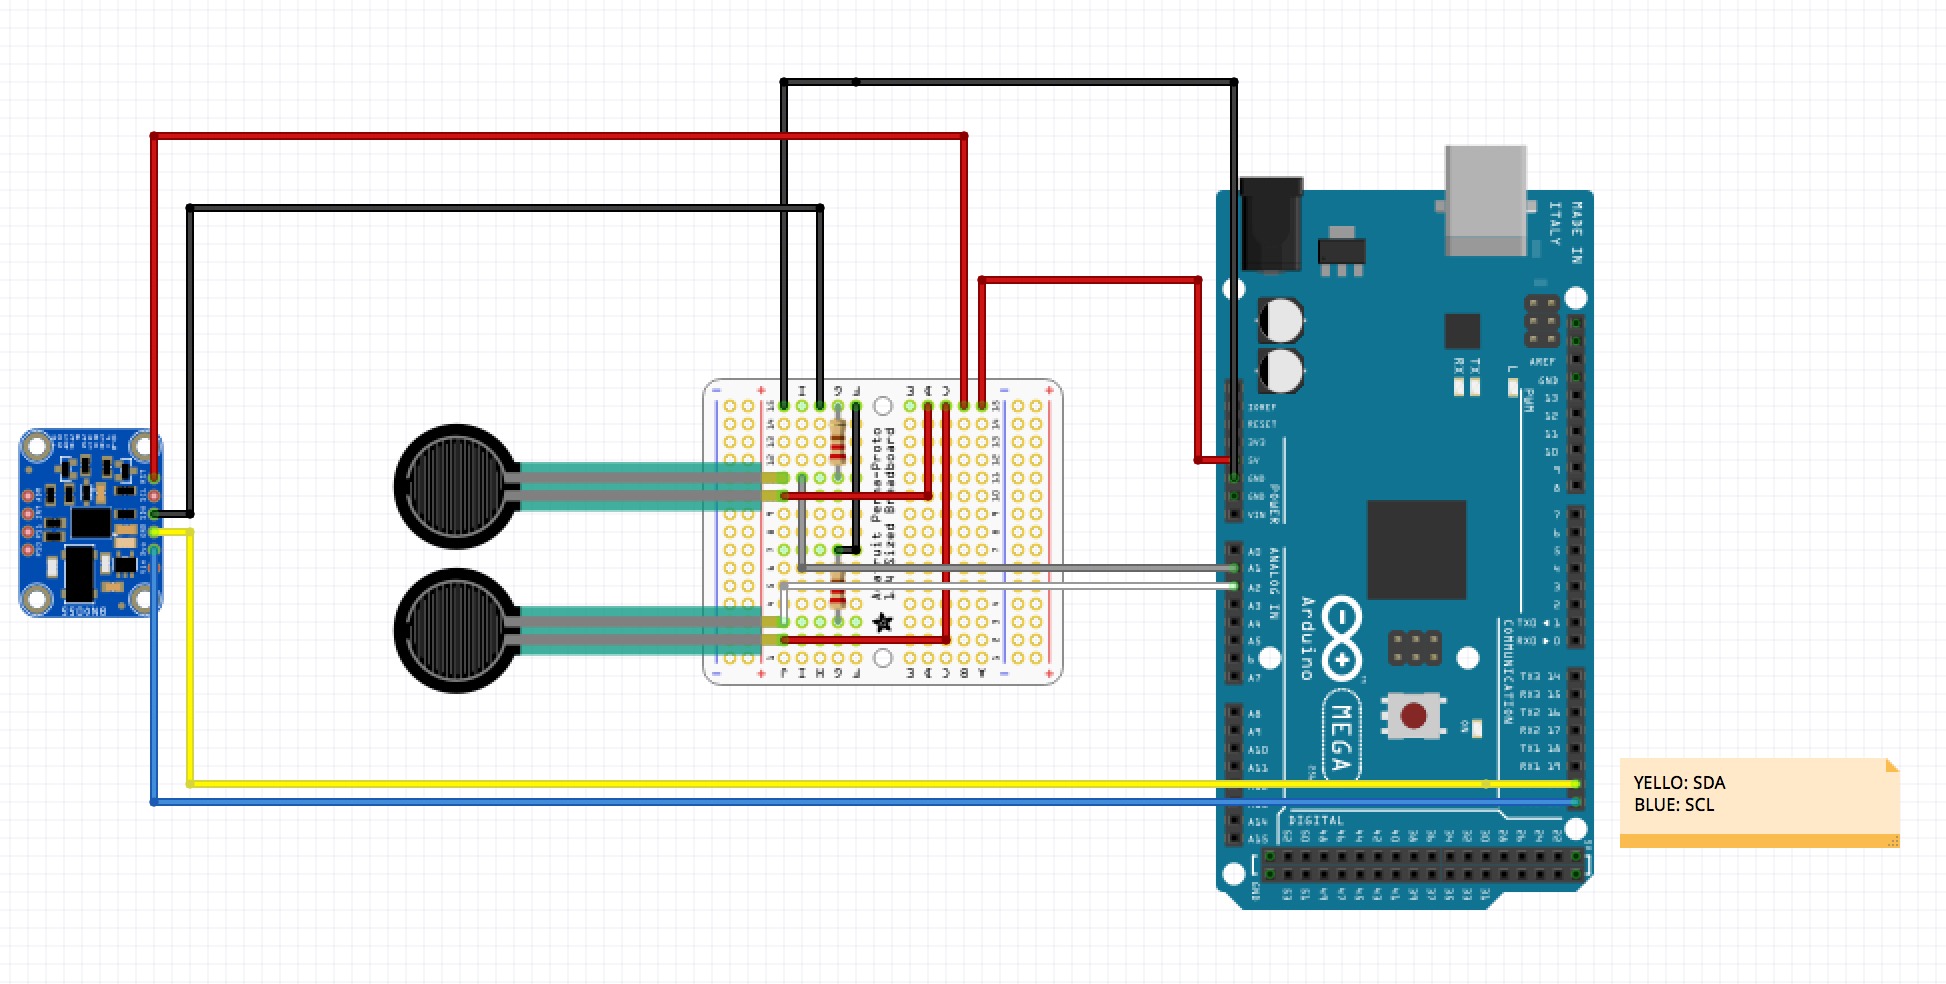
We used the following sensors :
Sensors testing
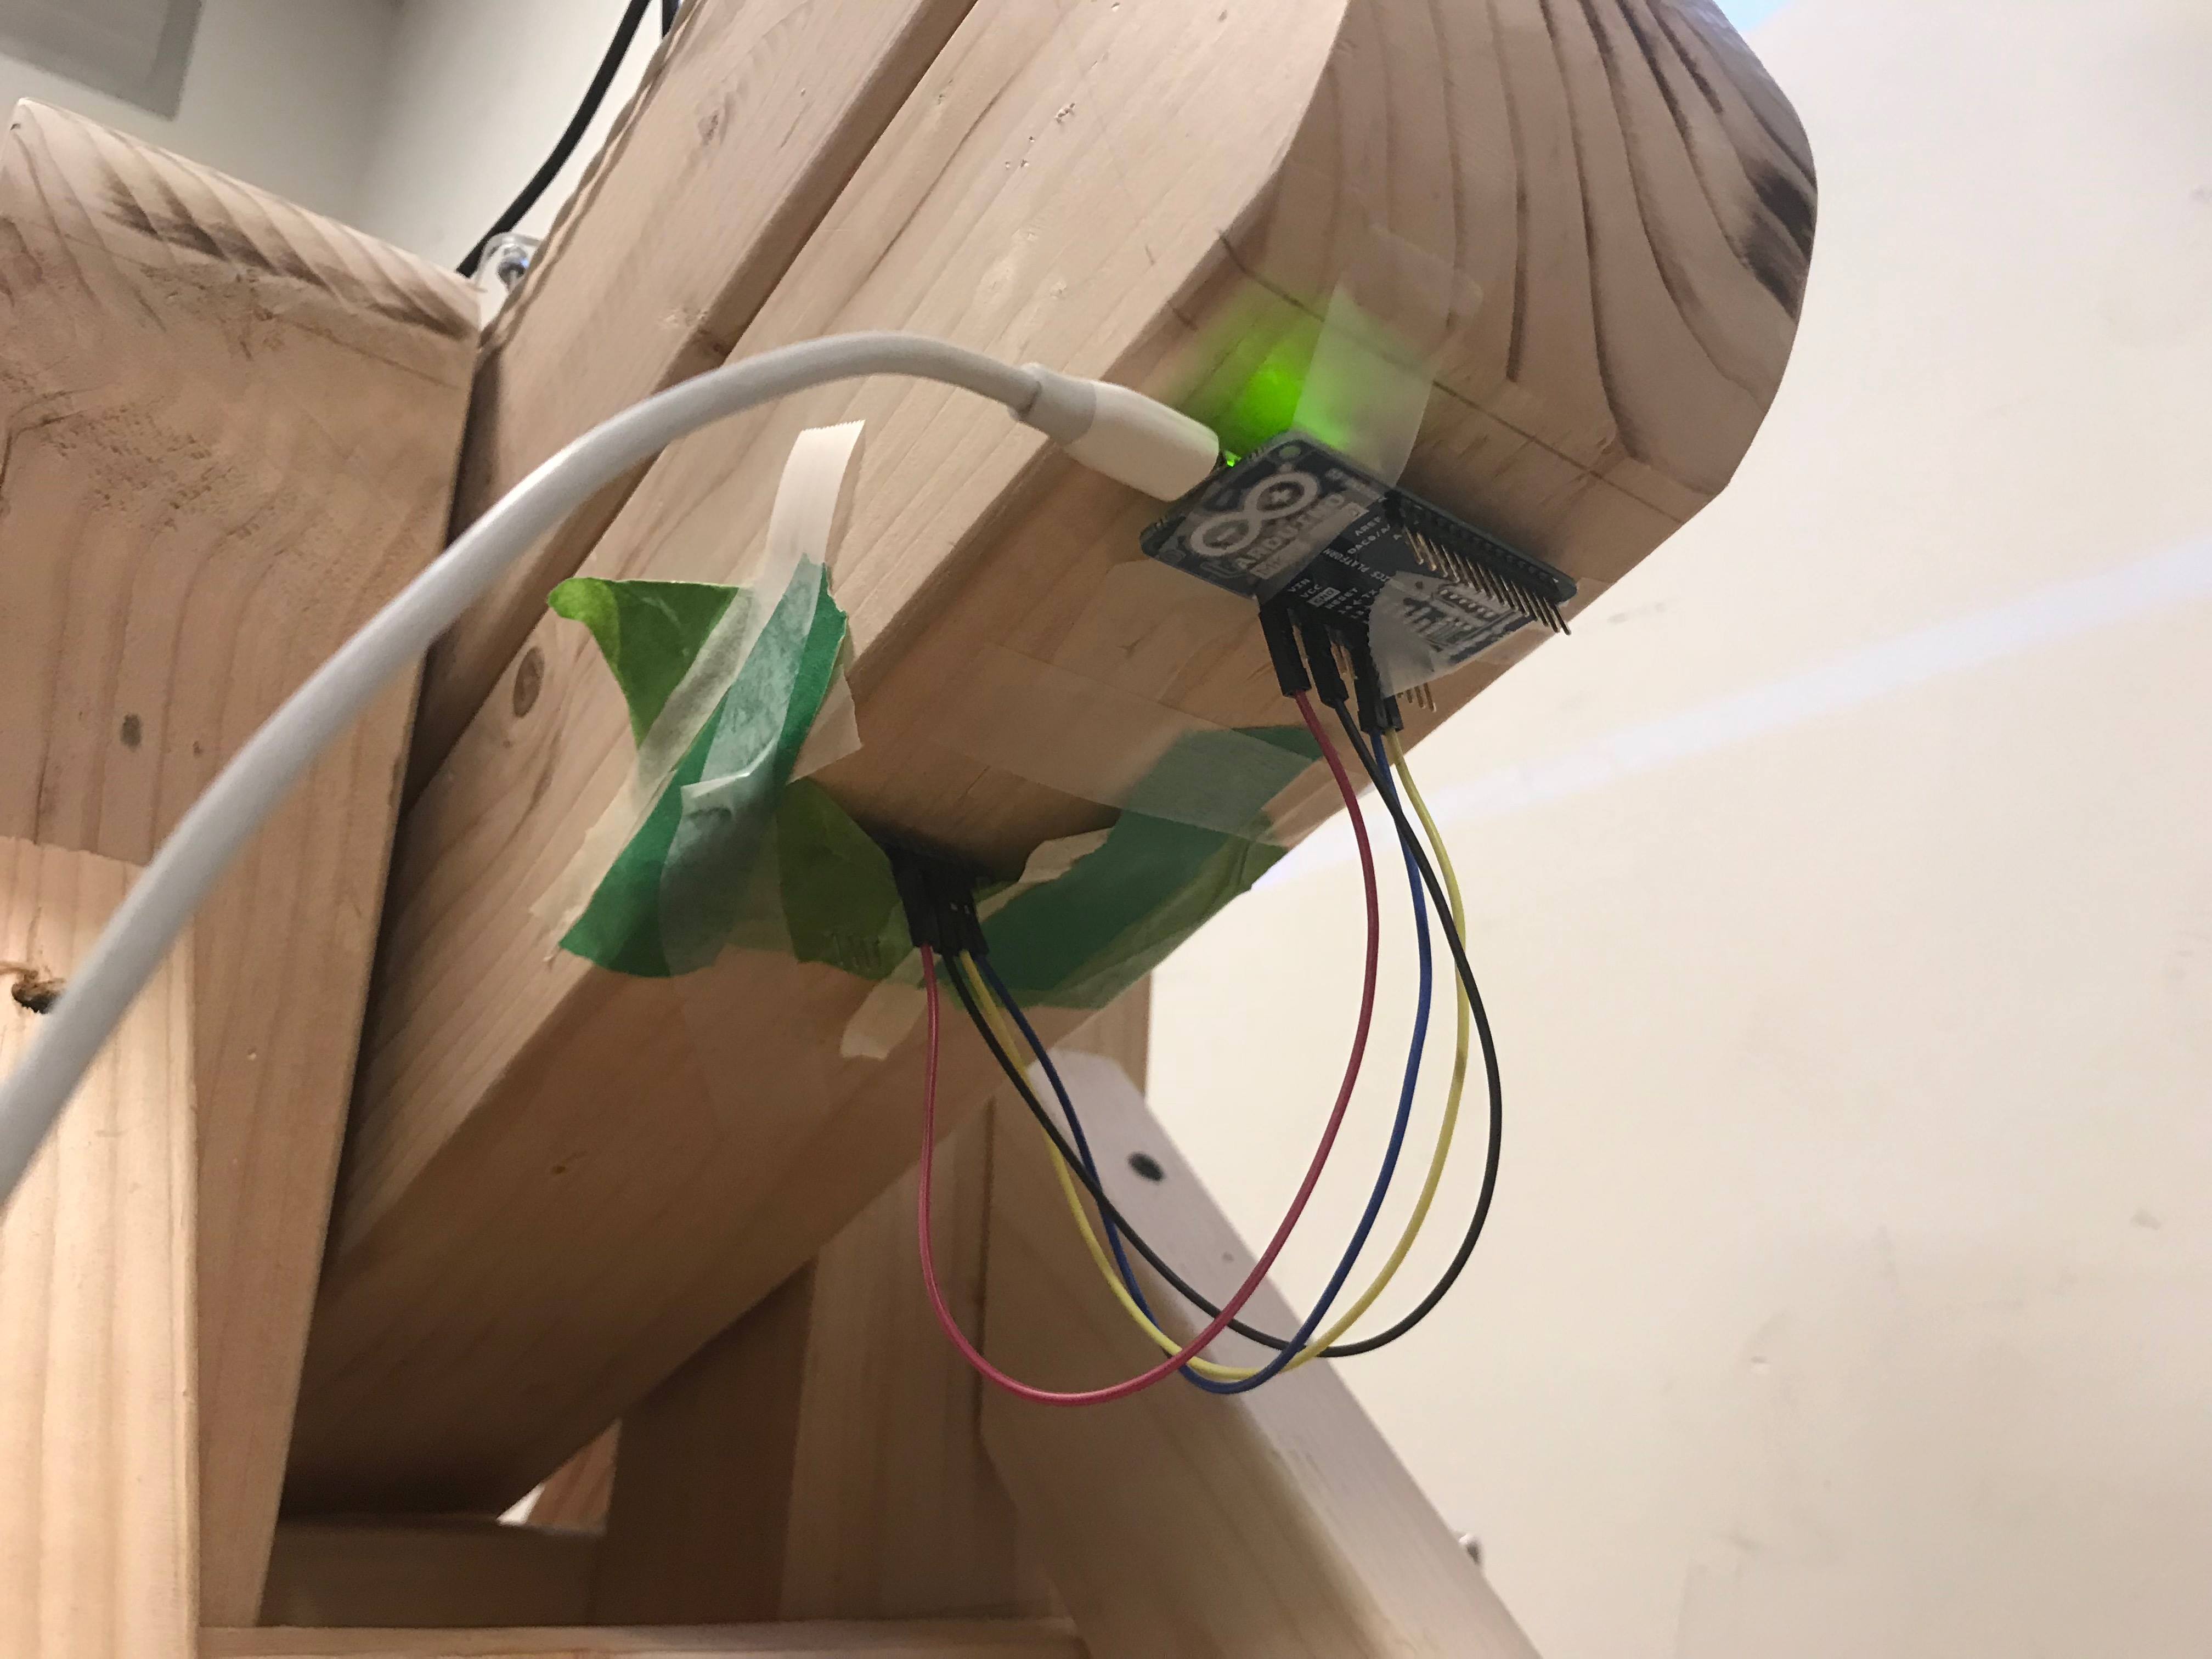
Serial Communicaton
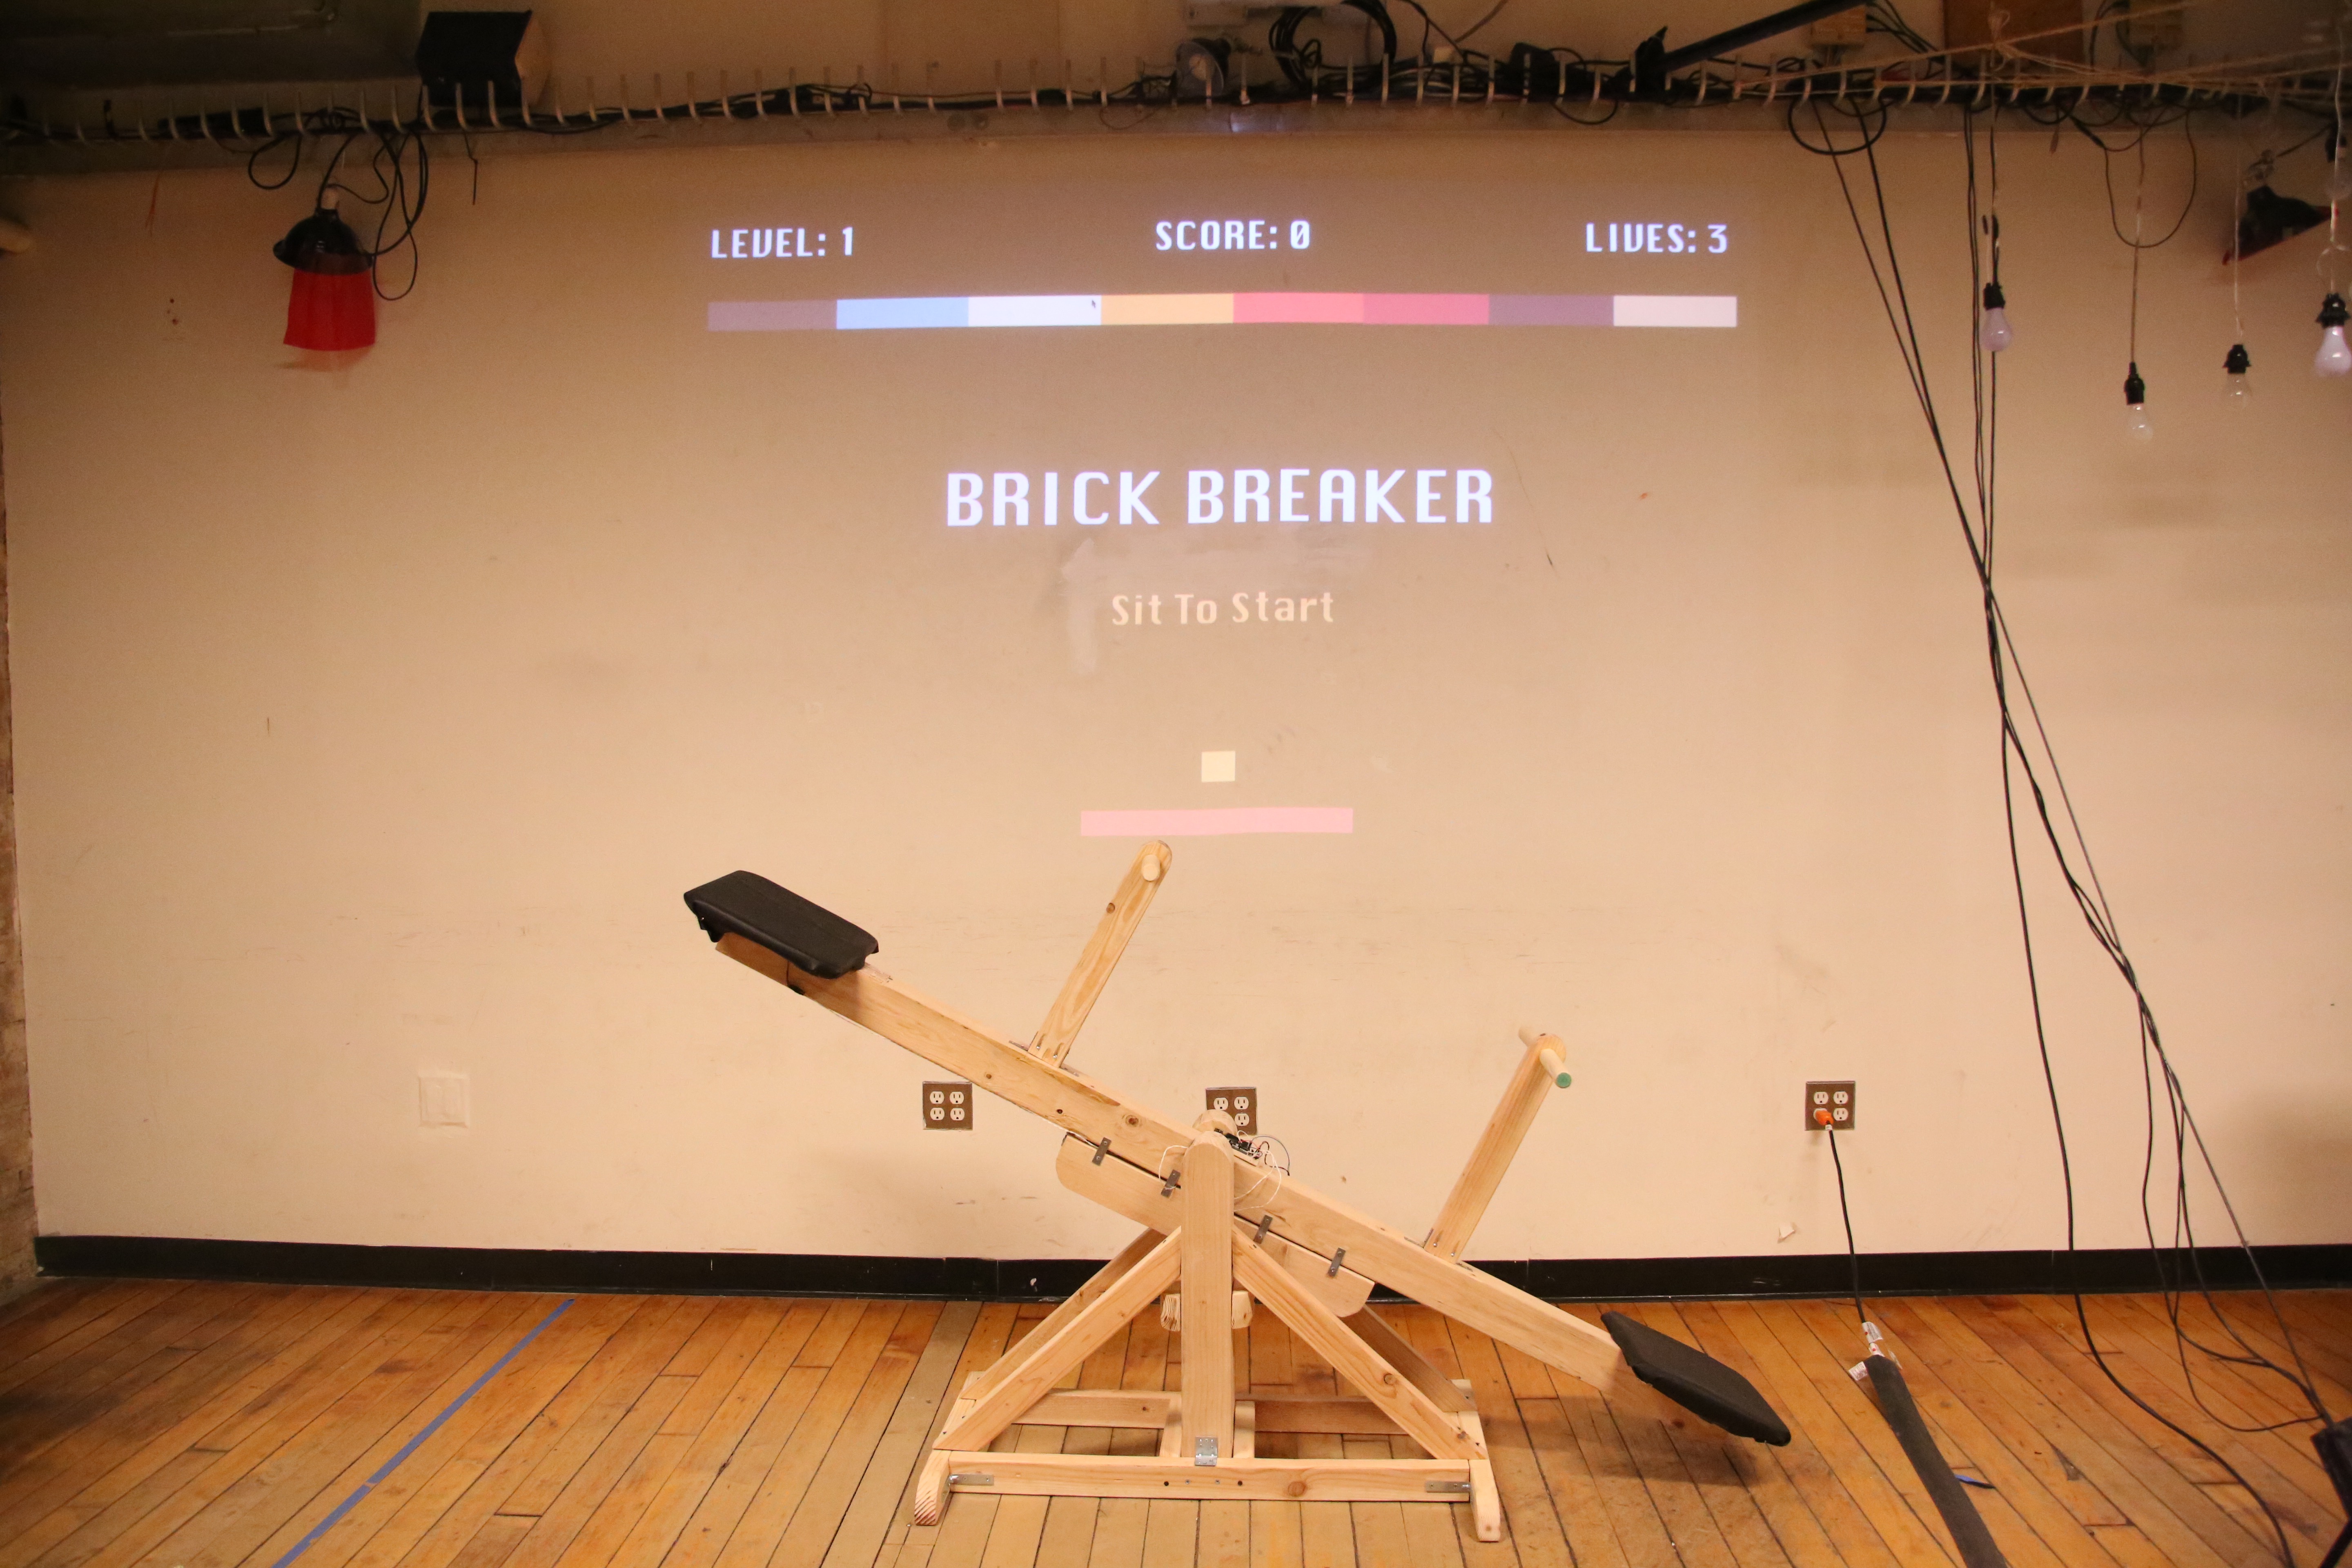
Brick Breaker - Game Component
Under the time constraint, we decided to build on an existing game. Our code is based on this brick breaker github repo. We polished the game interface and add needed features to integrate it into our project.
Interface Design
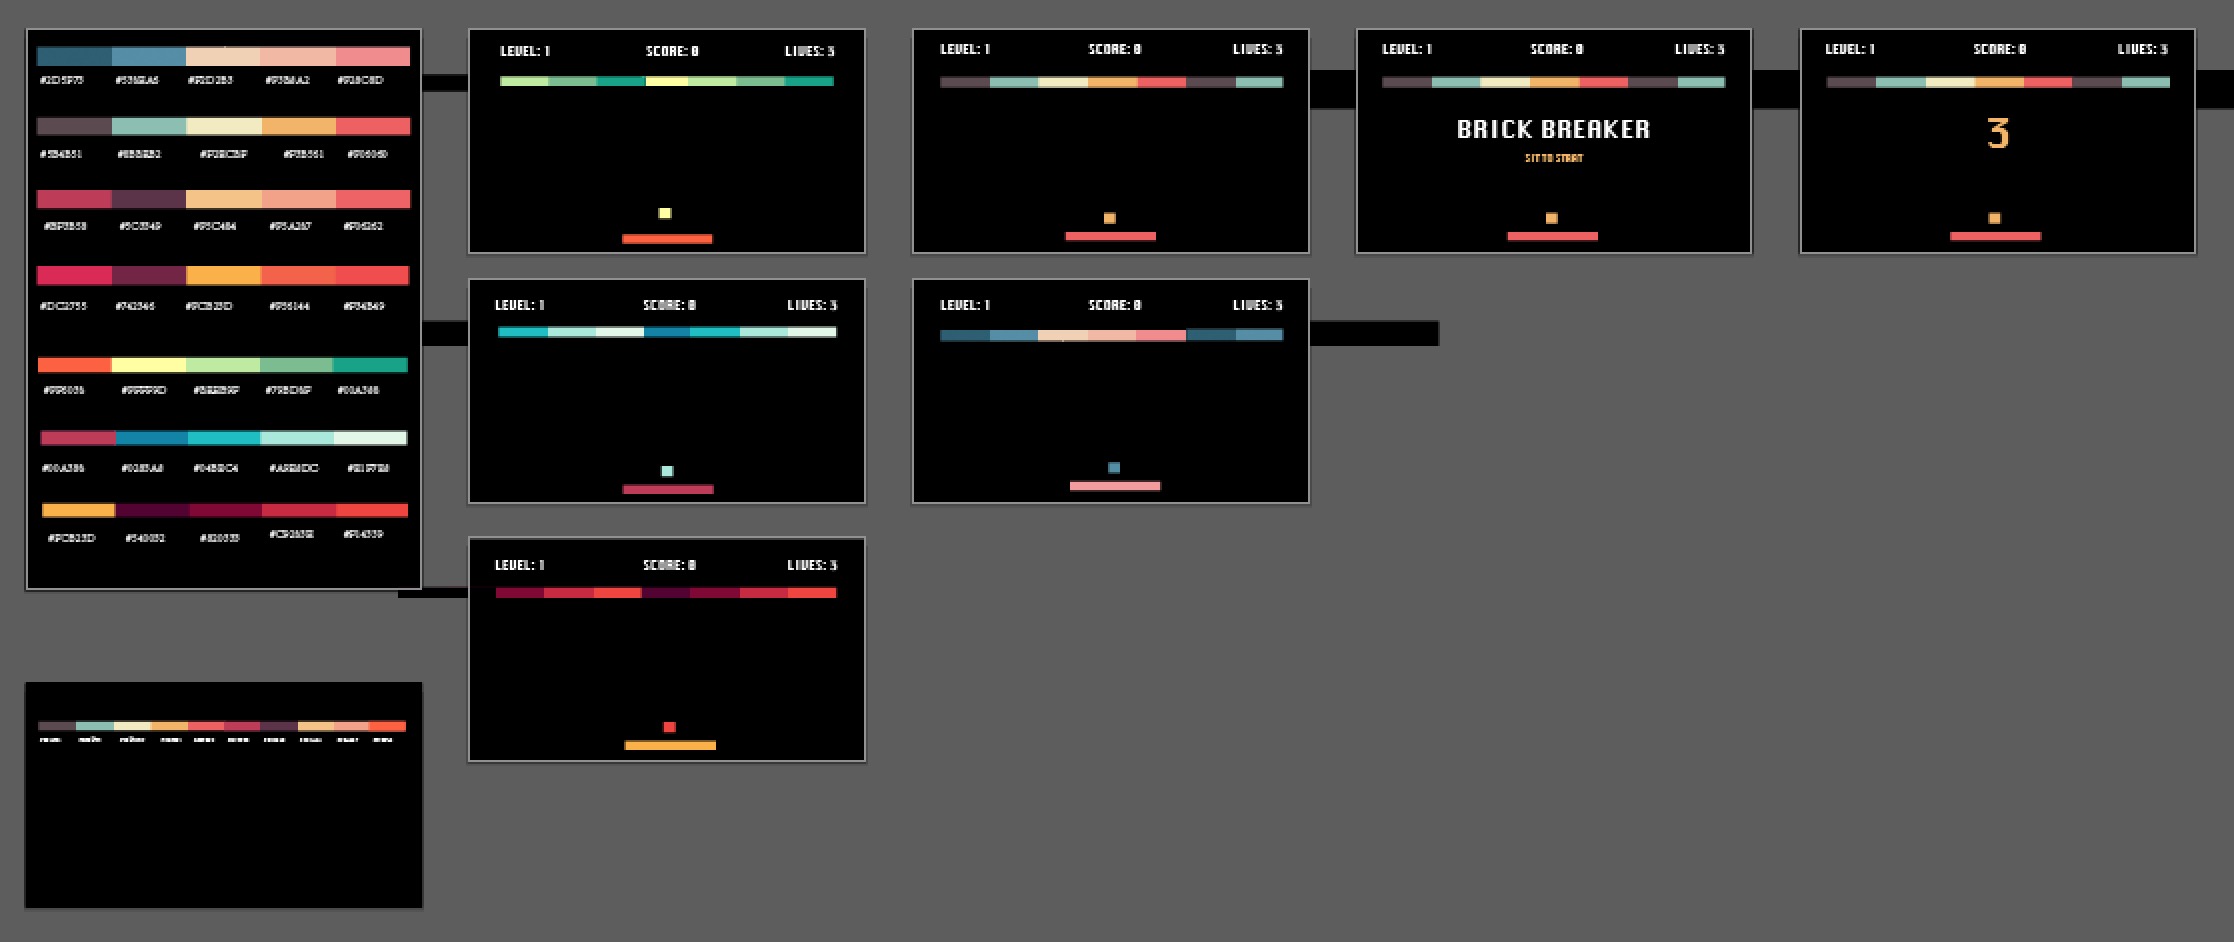
Game Features
From the the play testing feedback, we added features for a more enjoyable experience:
- Serial Events - get data from pressure sensor and orientation sensor
- Countdown timer
- Game reset - redirect back to splash screen once a game ends
- Interface update - color, font, layout
- Splash screen
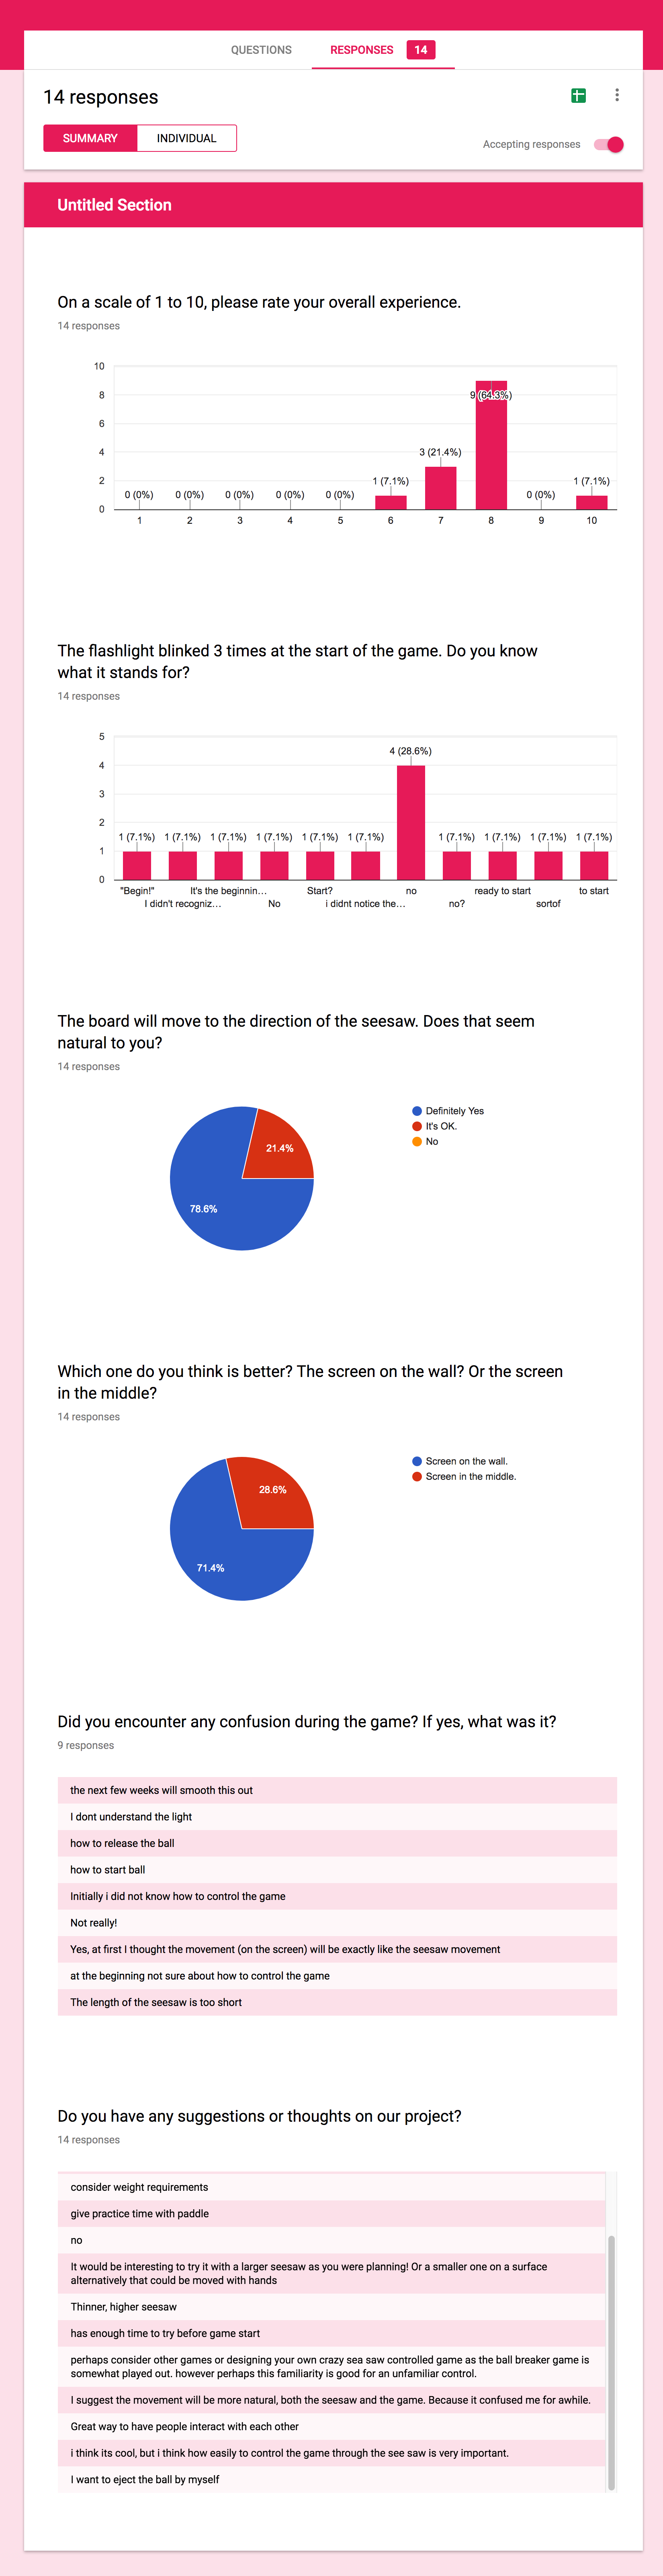
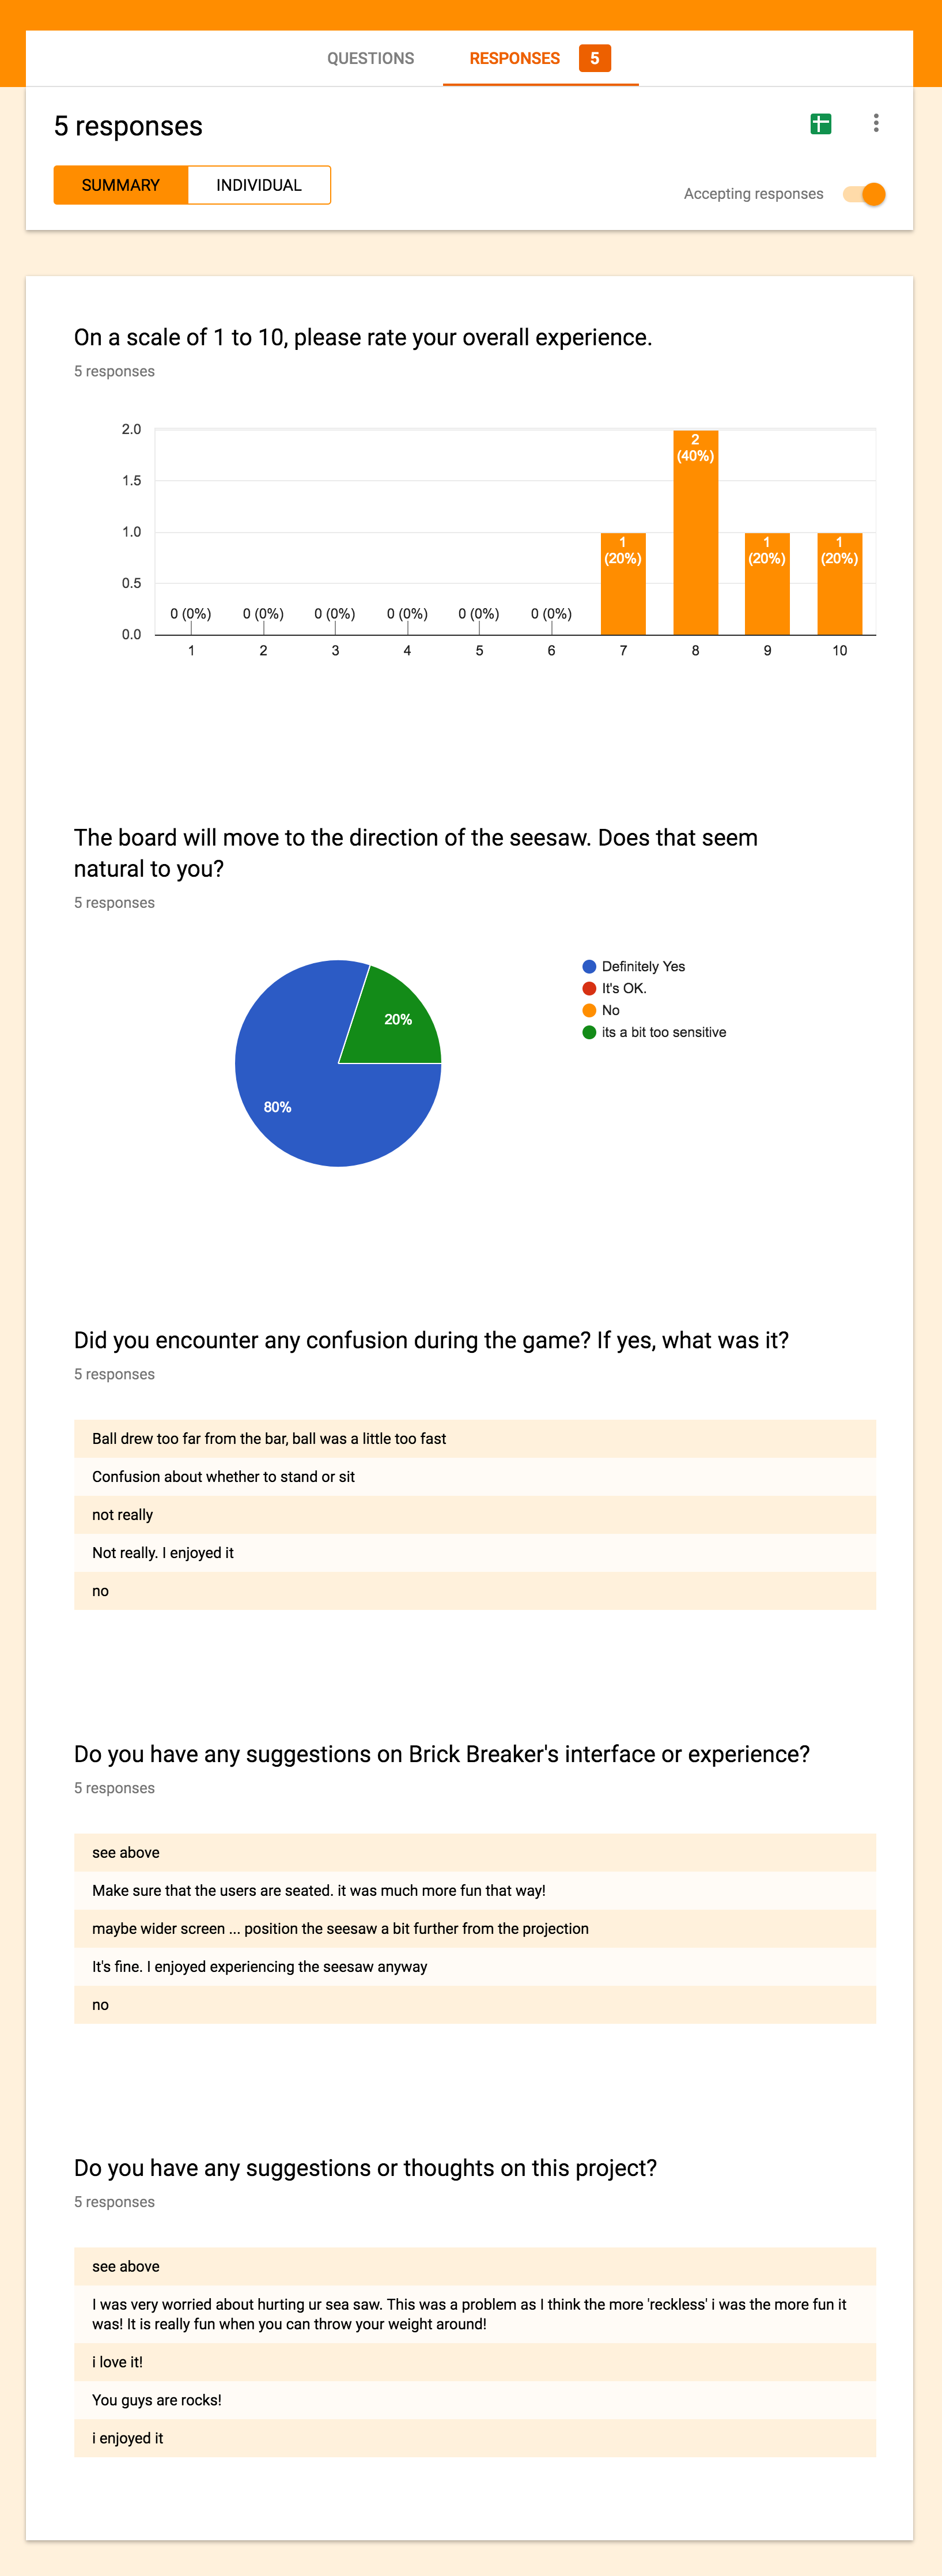
User Testing
Feedback
Final Product