Pulse Sensor Amped
Pulse Sensor
How does it work?
We are all very familiar with measuring heart rate manually - just think of doctor visits where the doctor or nurse listen to our pulse and count heart beats per minute. This method works because the expansion and contraction of blood vessel when blood enters and leaves the heart.
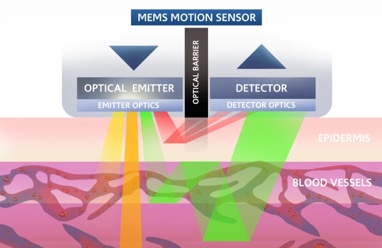
How does a pulse sensor measure heart rate? That utilizes a different method called photoplethysmography (or PPG). It is based on the fact oxygenated and de-oxygenated blood have different optical properties. By detecting a change in the absorbance or reflectance of light emitted onto the skin, we can measure pulse. Pulse sensors have up to two green LEDs flash onto the skin, and a light sensor measures the green light absorption and detect the peak. This is the basic idea of how optical pulse sensor work. If you have used any of the fitness tracker wearables on the market, such like Apple Watch and Fitbit, you can this method in action.
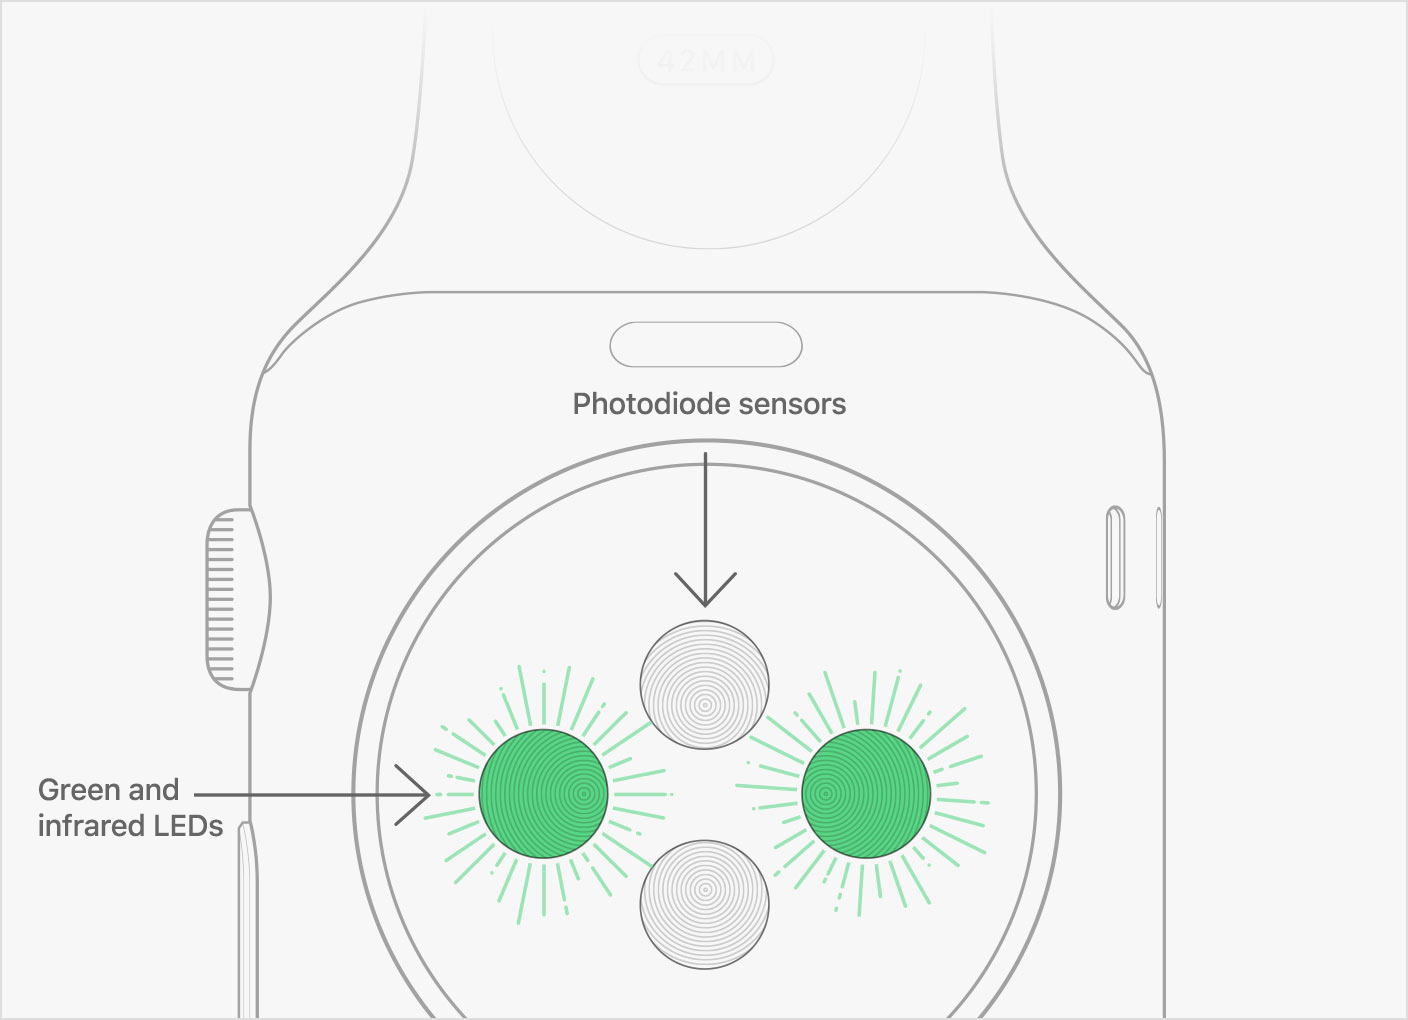 Apple Watch Tech Spec
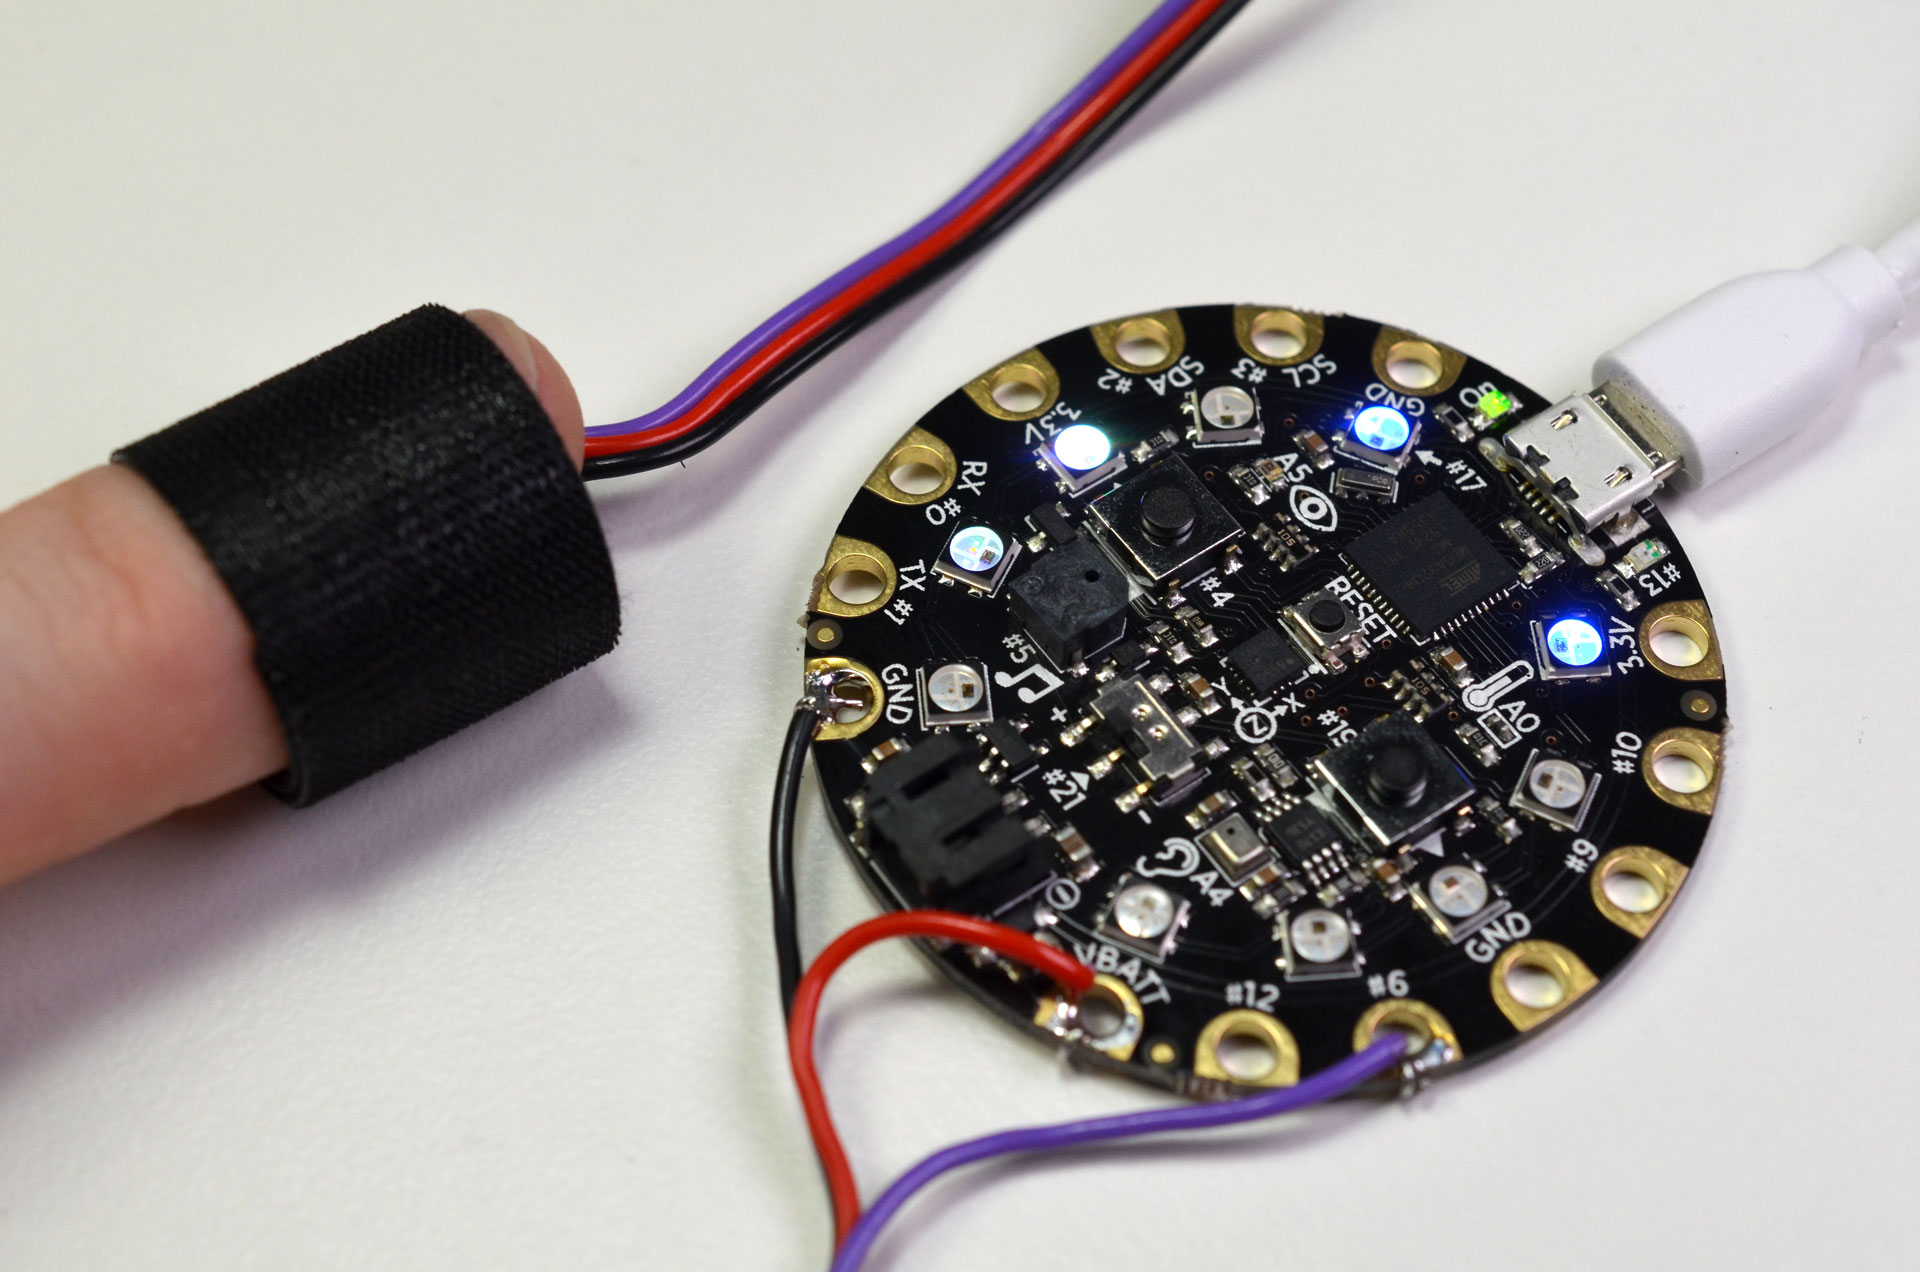
Description of Pulse Sensor Amped
The pulse sensor amped measures heart-rate based on PPG. It is an easy-to-use version of pulse sensor for Arduino. It makes incorporating live heart-rate data into projects straightforward. The kit comes with finger strap and ear clip. That provides ways to place the sensor and measure heart rate. We could use finger strap or attach ear clip, and then plug the sensor into Arduino. It also works with either a 3V or 5V Arduino.


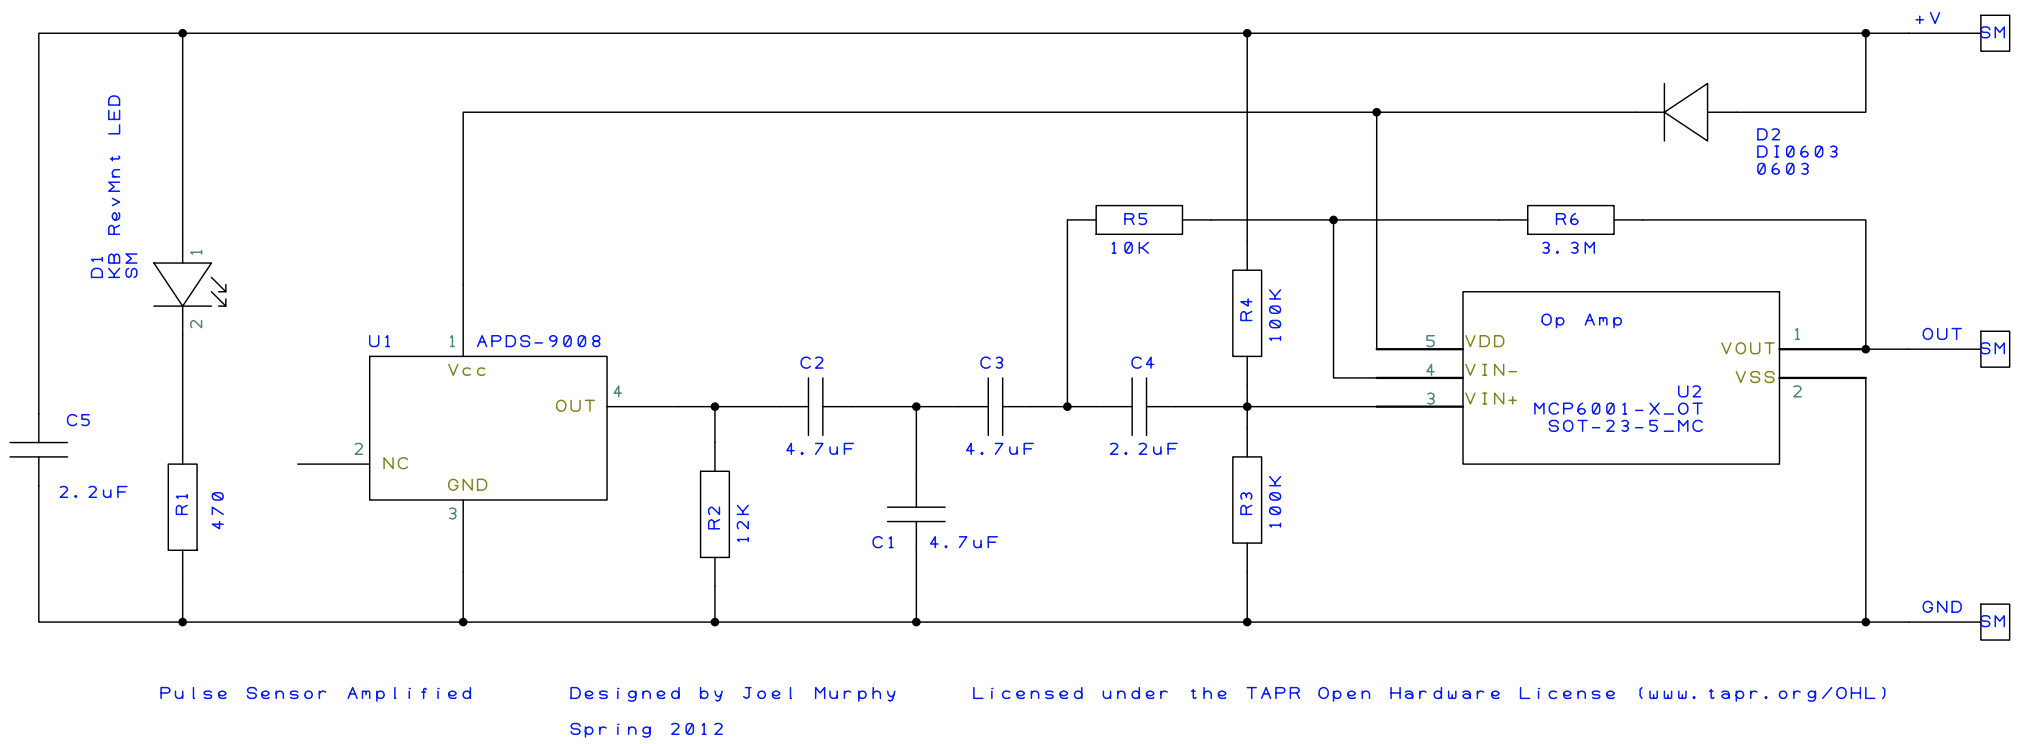
This sensor combines an optical heart rate sensor with amplification and noise cancellation circuitry. The improvements make the heart rate reading faster and more reliable. See sensor schematic:
Also, the Pulse Sensor creators made a complementary Processing visualization software for this hardware. Using the visualization software, one can instantly see output of the sensor and also use it for troubleshooting.


Data Sheet
The full data sheet can be found on the pulse sensor official website. Here are some of stats about this sensor:
- Diameter = 0.625” (~16mm)
- Overall thickness = 0.125” (~3mm)
- Cable length = 24” (~609mm)
- Voltage = 3V to 5V
- Current consumption = ~4mA at 5V
This sensor uses Ambient light Sensor (APDS-9008) from Avago. Also green bright reverse mount LED from Kingbright (AM2520ZGC09), added diode protection in case when it is plugged in backwards. Active filter and amplifier to change the pulse waveform.
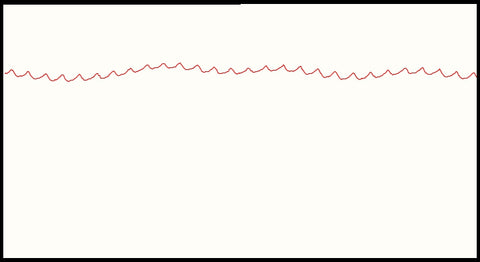
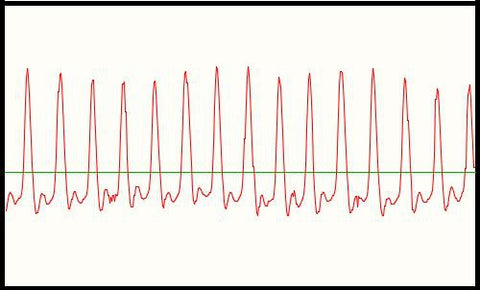
Reading Before added filter and amplifier:
 After:
Sample Projects
There are different types of projects that can incorporate live heart rate as part of its interactivity, such as wearables fitness tracker, meditation trainer, and sound and light installation.
Meditation Trainer
This project in particular points out a different way of using pulse data.
When we think of pulses, we normally think it is likely to be pretty constant values. However, our interval between beats (IBI) fluctuates a lot, and the variance between heart beat interval is known as heart rate variability (HRV). When we breath in a certain pattern, our cardiac rhythms can also fall in sync and HRV becomes a sine wave. Meditation Trainer is a project that uses live heart-rate and based on this interesting fact to train the user to breath better and reduce anxiety.
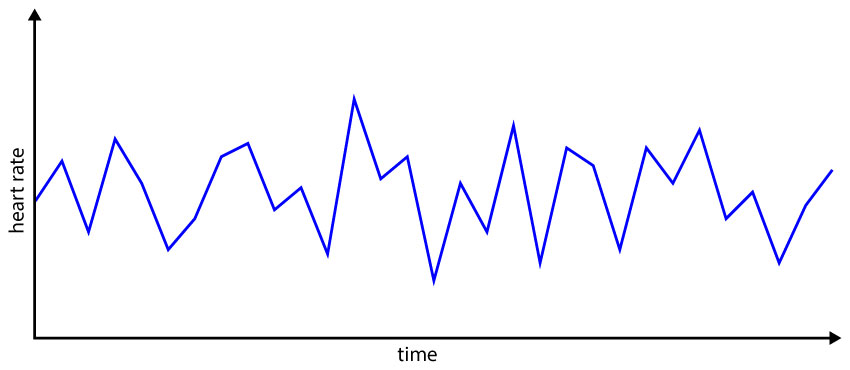 HRV pattern of someone that is feeling stressed
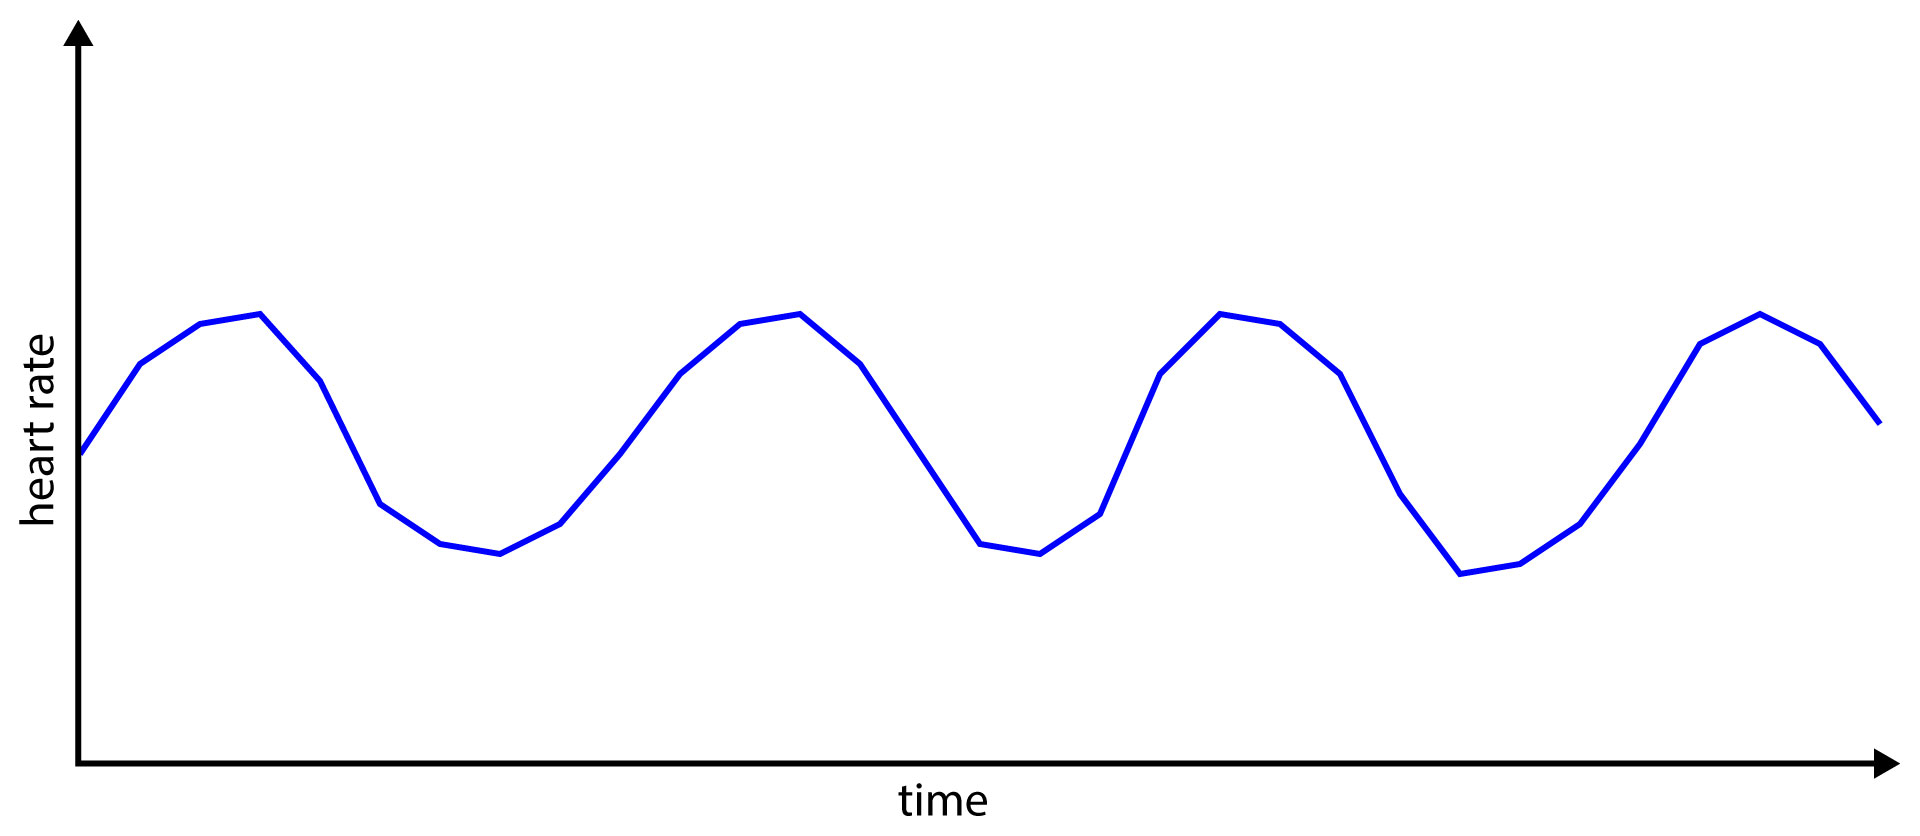 This is the goal of meditation trainer - calm breathing pattern
List of creative projects using pulse sensor amped
- Interactive mediation game: Heart Sync
- Light installation: Pulse Room
- Physical installation: Fall In Line
Strengths and Weaknesses
Strengths:
- Easy setup for use
- Small frame that can fit in most projects, good for wearables.
- It has a complementary software and well maintained library.
Weaknesses:
- The retail price is around $25. It is expensive; especially knowing its components.
- The circuit board is exposed, and need to prepare the sensor from body naturally produced sweat and oil. Otherwise, the board can be shorted by touching the solder points. The current solution is to use a thin film of vinyl on the sensor side. The back side can be protected by using a velcro dot or hot glue. Detailed instruction can be found on the starting guide
- The functionality is limited.
- The code involved for getting good reading can be complicated.
Example Schematic and Microcontroller Code
Here is the schematic and the code of using NeoPixels to display Pulse

Citations
- Information and links about how Pulse Sensor work found on Quora
- Pulse Sensor Amped project kinks and images found on Adafruit Pulse Sensor Amped
- Information on Pulse Sensor Amped found on the official website
- Data Sheet found here
- Schematic and Code found here